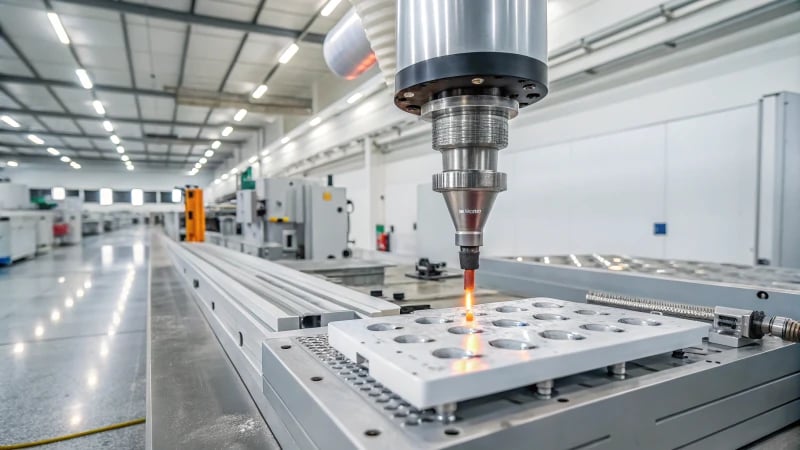
Picture the excitement of mastering injection molding with multi-step injection, turning raw substances into finely-made products.
Multi-stage injection in molding machines divides the process into steps such as initial injection, fast filling, slow filling and holding pressure. Each step adjusts speed, pressure and position to meet particular needs. This improves efficiency and quality by responding to material and product requirements. It adapts to demands.
Executing multi-stage injection requires skill and a good understanding of materials and design. The first successful attempt felt like hitting the perfect note in a song. Next, detailed steps and insider tips describe how to adjust and optimize this process. These insights help reach specific manufacturing goals. Dive deeper into multi-stage injection’s potential benefits.
Multi-stage injection enhances product quality in molding.True
By optimizing parameters, multi-stage injection improves the final product.
Single-stage injection is more efficient than multi-stage.False
Multi-stage injection adapts to material needs, enhancing efficiency.
What Are the Basics of Multi-Stage Injection Parameter Settings?
Ever looked at a plastic item, wondering how it got its perfect shape?
Multi-stage injection divides the molding process into parts꞉ initial injection, fast filling, slow filling and pressure holding. Each part needs specific settings for speed, pressure and position. These settings really depend on the material and the product’s design. It’s important.

Understanding Multi-Stage Injection
When I first explored multi-stage injection1, it felt like solving a tricky puzzle. Each step – the first injection, quick fill, slow fill, and pressure hold – plays its special part in creating good plastic items. The goal is simple: the material flows perfectly into the mold.
Stage Division
-
Initial Injection:
- Speed: 30-50mm/s
- Pressure: 30-60MPa for PE materials
- Position: 10%-30% of the mold volume, like measuring ingredients for the right texture.
-
Fast Filling:
- Speed: 100-200mm/s (PE), 50-100mm/s (PC)
- Pressure: 60-100MPa
- Position: Fills 50%-80% of the mold, racing to the end.
-
Slow Filling:
- Speed: 30-70mm/s
- Pressure: 40-80MPa
- Position: Covers 80%-95% of the mold volume.
-
Holding Pressure:
- Speed: Drops to 0-10mm/s
- Pressure: Holds between 50%-80% of the injection pressure.
Material and Product Considerations
Understanding a product’s shape and material feels like meeting someone new. Each material has traits—like PE’s smoothness or PC’s strength—that need special care. Thin walls need gentleness to avoid problems, but thick ones need strength.
Adjustment and Optimization Techniques
During mold tests, changing settings becomes creative. Seeing problems like short shots or flash during tests is like fixing work until it’s right. Sometimes, it means changing starting speeds or pressures based on observations.
| Stage | Common Adjustments |
|---|---|
| Initial | Speed reduction for ejection prevention |
| Fast Filling | Speed increase for efficiency |
| Slow Filling | Pressure adjustment for stress management |
| Holding | Time extension for accuracy |
Perfecting these settings is like perfecting a favorite dish. This improves product quality and maintains efficiency in the injection molding2 process.
Initial injection speed is 30-50mm/s for PE materials.True
The context specifies initial injection speed for PE materials as 30-50mm/s.
Holding pressure is always higher than injection pressure.False
Holding pressure is 50%-80% of injection pressure, hence lower.
How Do You Perform Multi-Stage Injection Step by Step?
Ever felt stressed by the exactness required in crafting plastic molds? I understand. I learned the skill of multi-step injection to really raise both quality and productivity. I guide others through this method, one step at a time.
Multi-stage injection focuses on adjusting each phase. The stages include initial injection, fast filling, slow filling and pressure holding. Each phase uses special speed and pressure settings. Knowing the material properties is very important. Mold design also plays a big role. Proper understanding of both leads to the best results. Optimal results depend on this knowledge.

Basics of Multi-Stage Injection Settings
Initially, multi-stage injection seemed like a tough puzzle to me. Once I learned to adjust each step – starting with injection, then fast filling, slow filling and pressure holding – it really transformed my work. Each stage needs different settings like speed, pressure and position to fit needs.
Dividing Injection Stages
Think of shaping a clay model. Every part needs a special touch. Multi-stage injection works like this. Thin parts require a gentle approach to avoid flaws like ejection or flash. Here’s a quick rundown:
Understanding your materials is very important. For instance, polyethylene (PE) flows easily, unlike the tougher polycarbonate (PC), needing unique settings.
| Stage | Speed (mm/s) | Pressure (MPa) | Position (% Volume) |
|---|---|---|---|
| Initial | 30-50 | 30-60 | 10-30 |
| Fast Filling | 100-200 (PE), 50-100 (PC) | 60-100 | 50-80 |
| Slow Filling | 30-70 | Adjust as needed | Adjust as needed |
| Holding Pressure | Very low | 50%-80% of initial levels | Maintain |
Specific Operation Steps
First-Level Injection: Starting Injection
I prefer to begin gently, using a lower speed of about 30-50mm/s and moderate pressure (30-60MPa for PE). This method allows the melt to enter smoothly without shooting out. The position usually covers 10%-30% of the cavity volume.
Second-Level Injection: Fast Filling
In this stage, speed increases up to 100-200mm/s for PE. Pressure shifts to 60-100MPa to fill the cavity effectively without errors.
Third-Level Injection: Slow Filling
Next, speed smoothly eases down to about 30-70mm/s. Adjusting pressure here is vital for perfect internal features.
Fourth-Level Injection: Holding Pressure
Patience is key in this last step. A very low speed keeps while holding pressures between 50%-80% of initial levels to aid cooling.
Adjustment and Optimization in Practice
Mastery in multi-stage injection needs practice and change. Watching out for problems like ejection or short shots during mold trials is essential, adjusting speeds and pressures as necessary.
Constant feedback really helps; I use it to sharpen my method for top results. Whether dealing with inside stress or appearance, adjusting settings based on quality feedback3 guarantees my work is functional and good-looking.
Multi-stage injection requires 3-5 stages.True
Most machines support 3-5 stages, allowing customizable settings.
Holding pressure is set at 90% of injection pressure.False
Holding pressure is typically 50%-80% of the injection pressure.
What Key Adjustments Should I Make During Mold Trials?
Finding your way in mold trials might seem intimidating. However, small changes turn challenges into victories.
Mold trials are very important. Engineers adjust multi-stage injection settings. Defects like short shots or ejection should be fixed. Changes depend on feedback about the product’s quality. These changes are necessary. Perfect products require these actions.

Understanding Multi-Stage Injection Parameters
Starting with mold trials, I quickly saw how important different injection stages are. Each part—beginning injection, fast filling, slow filling, and pressure holding—needs specific speed, pressure, and position. It’s like an orchestra where all instruments must work together perfectly.
| Stage | Speed (mm/s) | Pressure (MPa) | Position Control (%) |
|---|---|---|---|
| Initial | 30-50 | 30-60 | 10-30 |
| Fast Filling | 100-200 | 60-100 | 50-80 |
| Slow Filling | 30-70 | 40-80 | 80-95 |
| Holding | 0-10 | 50-80% of inj. | 95+ until end |
Product Structure and Material Properties
Early on, I realized that the product shape and material are very important. Complex designs with different wall thicknesses need certain changes. Filling a thin wall with too much force is like trying to blow up a balloon with a firehose. Careful speed and pressure adjustments stop defects like ejection or short shots.
Specific Adjustments During Mold Trials
Mold trials involve watching and changing things. Watching how the melt moves and adjusting settings to fix problems like ejection or short shots is key. Slowing the initial speed can really help prevent ejection.
- Ejection: Lower starting speed or pressure.
- Short Shot: Raise speed or pressure during specific points.
Optimization Based on Product Quality Feedback
Quality feedback from the final product acts as a guide. If stress causes bending, tweaking slow filling or extending holding time helps. Fast filling speeds also change the surface quality.
- Warpage: Change slow filling settings or hold longer.
- Surface Quality: Modify fast filling speed.
Feedback lets me perfect settings for steady production results. This constant improvement leads to mastering mold trials and creating top-notch products. Every adjustment brings more success, turning trials into triumphs.
Initial injection speed should be 100-200 mm/s.False
Initial injection speed is 30-50 mm/s, not 100-200 mm/s.
Warpage can be reduced by extending holding time.True
Extending holding time helps reduce warpage by minimizing residual stress.
How Does Product Quality Feedback Enhance Multi-Stage Injection?
Think about changing every small part of your product’s development just by hearing what it’s saying to you.
Feedback on product quality shows problems and spots for improvement. It reveals defects. It helps adjust speed, pressure and position settings at each stage with great precision. Precise tweaks are possible.

Understanding Multi-Stage Injection Basics
When I entered product design, feedback from people and products became important. Think about a coffee cup telling you if it’s too thick or thin. That’s what product quality feedback does in multi-stage injection molding.
In multi-stage injection, the molding process is divided into distinct stages such as initial injection, fast filling, slow filling, and pressure holding. Each stage has unique settings for speed and pressure4, which can be adjusted based on feedback to improve outcomes.
Injection Stage Parameters
| Stage | Speed (mm/s) | Pressure (MPa) |
|---|---|---|
| Initial | 30-50 | 30-60 |
| Fast Filling | 100-200 | 60-100 |
| Slow Filling | 30-70 | 40-80 |
| Pressure Hold | 0-10 | 50%-80% of injection pressure |
Importance of Product Structure and Material Properties
I worked on a project with complex plastics. Feedback showed how product structure5 and material characteristics influence injection settings. For instance, thin-walled sections might require lower speeds to prevent defects, while thick-walled sections benefit from increased pressure.
Feedback in Adjusting Injection Parameters
First-Level Injection Adjustments
Once, I handled problems during the first injection. In cases of ejection or short shots, feedback may suggest lowering initial injection speed or adjusting pressure to smoothen the melt entry. Position control is crucial, typically set at 10%-30% of the cavity volume.
Enhancing Second-Level Injection
Fast filling benefits from a quicker speed setting (100-200mm/s for PE) to boost production efficiency. Feedback warns about overfilling or defects like flash, guiding adjustments.
Optimizing Third-Level Injection
Slow filling cuts internal stress. Feedback helps refine this stage by hinting at adjusting speed back to 30-70mm/s or changing pressure based on observed issues like warpage.
Fine-Tuning Fourth-Level Injection
Adjusting holding pressure helps with cooling changes. Holding pressure adjustments are pivotal to compensating for cooling-induced volume changes. Feedback on product dimensional accuracy and density can guide setting these parameters for optimal results.
Using Product Quality Feedback Effectively
As a designer, feedback teaches me about flaws and directs necessary parameter adjustments. For example, if warpage occurs during the third injection stage, slowing down may be beneficial.
By leveraging feedback effectively, manufacturers can enhance the precision of their multi-stage injection6 process, ultimately leading to improved product quality and reduced defect rates. This iterative approach allows for continuous improvement in the manufacturing cycle.
Fast filling requires 100-200mm/s speed for efficiency.True
Fast filling stage benefits from increased speed to enhance production efficiency.
Holding pressure is set at 90% of injection pressure.False
Holding pressure is typically set at 50%-80% of the injection pressure.
Conclusion
Multi-stage injection molding enhances product quality by dividing the process into stages, allowing precise adjustments in speed, pressure, and position based on material properties and design requirements.
-
Learn about the fundamentals and benefits of multi-stage injection molding. ↩
-
Explore detailed explanations of the injection molding process stages. ↩
-
Understanding this will help you adjust multi-stage injection parameters based on product quality feedback, enhancing production outcomes. ↩
-
Explore how optimal settings can improve injection outcomes by understanding adjustments based on feedback. ↩
-
Learn how different product structures affect molding settings and how feedback informs adjustments. ↩
-
Discover how feedback-driven adjustments lead to enhanced precision and reduced defects in injection processes. ↩


