Have you ever been curious about what happens behind the scenes of plastic injection molding? Let’s explore this intriguing process together!
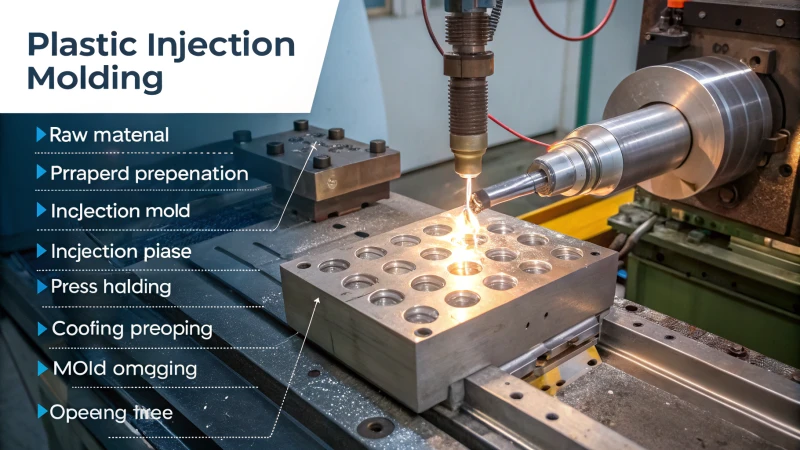
Plastic injection molding involves preparing raw material, injecting it, pressing and holding, cooling, and opening the mold. Each crucial step ensures the production of high-quality plastic products that meet functional and aesthetic standards.
I remember the first time I watched a machine mold plastic parts. It was fascinating. Raw materials changed into exact pieces. This article describes each stage of the process. First, workers prepare the raw materials. Then, a new product emerges. Every step involves more than just technique. It’s a coordinated dance of precision and timing. Quality is crucial in every part.
Plastic injection molding involves multiple critical stages.True
No explanation available.
Cooling is the least important stage in injection molding.False
Cooling is crucial for solidifying the plastic and ensuring product integrity, making it very important.
- 1. What Are the Key Components of an Injection Molding Machine?
- 2. How Does Temperature Affect the Injection Molding Process?
- 3. What Are the Common Materials Used in Injection Molding?
- 4. How Can Design Influence the Injection Molding Cycle?
- 5. What Are the Challenges Faced During the Injection Molding Process?
- 6. How Does Maintenance Impact the Performance of Injection Molding Machines?
- 7. Conclusion
What Are the Key Components of an Injection Molding Machine?
Do you ever think about how plastic parts become real? Injection molding machines probably interest me and they are important for people who want to improve production processes. Let’s look at the main parts that help these machines work!
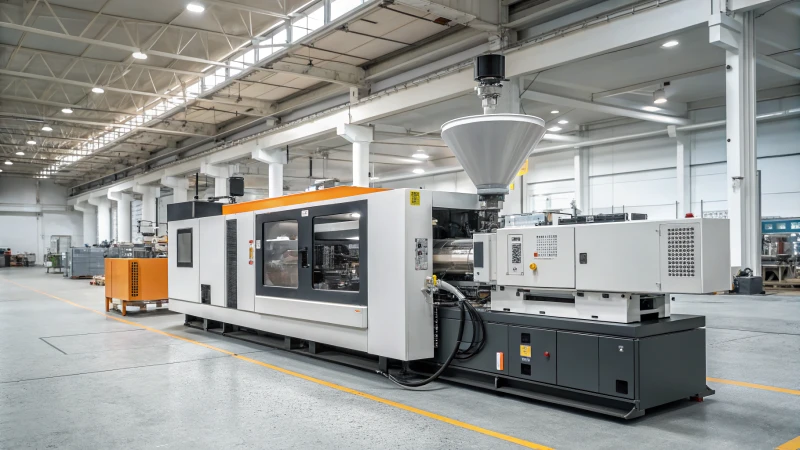
An injection molding machine consists of raw material preparation, injection mechanism, press holding system, cooling system, and mold opening mechanism, all essential for efficiently producing quality plastic parts.
Raw Material Preparation Stage
Creating a plastic part begins with preparing raw materials. I remember my first days in the factory. I poured thermoplastic granules into the hopper at the machine’s top. I felt really excited about what was coming next. Those tiny plastic pellets are not just material; they are the building blocks of our creations.
As gravity pulls the granules into the barrel, a crucial heating chamber, real transformation happens here. A heating ring raises the temperature above the melting point. Different plastics need different temperatures, for example:
| Plastic Type | Melting Temperature (°C) |
|---|---|
| Polystyrene (PS) | 180 – 240 |
| Polycarbonate (PC) | 220 – 260 |
During this time, the screw spins inside the barrel. The spinning does not just slide the granules forward; it melts them faster by shearing. It’s like witnessing a culinary masterpiece unfolding!
Injection Stage
The plastic melt reaches the right temperature and fluidity, and then the injection stage starts. This gets really thrilling! The injection system has a screw and an injection cylinder. It’s like a chef squeezing icing onto a cake. The screw pushes forward, sending the melt into the mold’s runner system through a nozzle.
Injection pressure then becomes vital as it helps the plastic fill every part of the mold evenly and quickly. I’ve watched how changing injection speed avoids defects like short shots or weld marks. This is crucial for delicate, thin-walled products we love. It feels almost like a race against time, making sure everything is perfect!
Press Holding Stage
After filling, we enter the press holding stage where the screw applies pressure to the plastic in the mold cavity. It’s like pressing your dish well before serving. This stage helps with shrinkage during cooling, making sure everything turns out right.
The time needed can change based on several factors such as:
- Properties of the plastic material
- Wall thickness of the product
For thicker items, holding times can vary from 10 to 30 seconds for parts with wall thicknesses of 5-10mm. It’s a careful balancing act!
Cooling Stage
Next comes cooling; this is maybe my favorite part! The mold has channels for cooling where water or oil circulates to take heat from the plastic so it solidifies perfectly.
I often marvel at how cooling time varies with thermal properties and wall thickness: high thermal conductivity materials cool faster.
Too little cooling might cause deformations after demolding—a real heartache after much work—but too much cooling drags production times; no one wants that!
Mold Opening and Demolding Stage
Finally, when everything cools perfectly, we reach the grand finale: mold opening and demolding stage! The clamping mechanism moves while an ejector mechanism gently pushes finished parts out of their cavities.
I love that reveal moment! The demolded products are collected for further steps like trimming or removing gates before we prepare for another cycle—it’s a seamless process that lets us produce high-quality plastic components efficiently.
This whole process shows how each part of an injection molding machine holds a vital role in bringing our ideas to life. If you’re interested in exploring more detailed resources about each component’s functionality, check out more detailed resources here1.
Injection molding machines use thermoplastic granules as raw material.True
The injection molding process primarily utilizes thermoplastic plastic granules, which are essential for creating fluid melts during production.
Cooling time is irrelevant in the injection molding process.False
Cooling time is critical; insufficient cooling can deform products, while excessive cooling prolongs production time unnecessarily.
How Does Temperature Affect the Injection Molding Process?
Did you ever think about how something as basic as temperature affects the injection molding process? Temperature plays a key role in this method. It has a big influence on production quality. It also affects how fast and well the process works. Let’s dive into understanding this important factor.
Temperature significantly influences the injection molding process, affecting raw material preparation, cooling, and demolding. Proper temperature management ensures product quality, optimal cycle times, and reduced defect rates.
The Role of Temperature in Raw Material Preparation
First, I want to talk about the first step in injection molding: raw material preparation. I was amazed to see tiny thermoplastic granules poured into the hopper at the top of the molding machine. It looks like magic as gravity pulls those granules into the heating barrel.
Inside this heating chamber, temperatures must go above a specific melting point. This heat helps granules become a smooth melt. For example, polystyrene melts at about 180-240℃. Polycarbonate needs more heat, with a melt range of 220-260℃. Missing that perfect temperature range leads to problems like poor fluidity or degraded material. This stage is truly vital. It lays the groundwork for the following stages.
Injection Stage: Temperature and Pressure Dynamics
Now with melted plastic ready, we start the injection stage. This phase is like a speedy race. Molten plastic must flow into the mold quickly without solidifying prematurely.
Temperature, injection pressure and speed are crucial. Higher temperatures decrease viscosity. This change helps fill complex molds easily. But too much heat might cause flash or overflow problems. It really requires a delicate touch! For thin-walled items, a faster injection is necessary to prevent early cooling. Finding the right temperature setting ensures quality and speed.
Press Holding and Cooling Stages: Temperature Management
Once the mold is filled, press holding happens. This is like holding your breath during a tense movie scene. The screw adds pressure to balance any shrinkage during cooling. Temperature control is again essential.
We hold pressure for varying times based on material properties and wall thickness. Thicker walls keep heat longer, needing more holding time. Larger plastic items often need 10-30 seconds of press holding for uniform density.
Then, cooling comes next. This is really my favorite part due to its complexity. Cooling channels circulate liquids like water or oil. Their job is to pull heat from the plastic, solidifying it inside the mold. Materials with high thermal conductivity cool quickly. Those with low conductivity take more time. This step is very crucial. Too little cooling causes deformation and too much extends production.
Conclusion Stage: Mold Opening and Demolding Considerations
Finally, we reach the moment of truth: mold opening. This step feels like revealing a masterpiece after much effort. We must handle this carefully to avoid ruining detailed designs.
Temperature is still important here. The product must keep its shape and strength during demolding. Balancing temperatures throughout all stages improves production efficiency. It results in high-quality products we can be proud of. A lot more exists to learn about best demolding practices! Discover best practices in demolding.
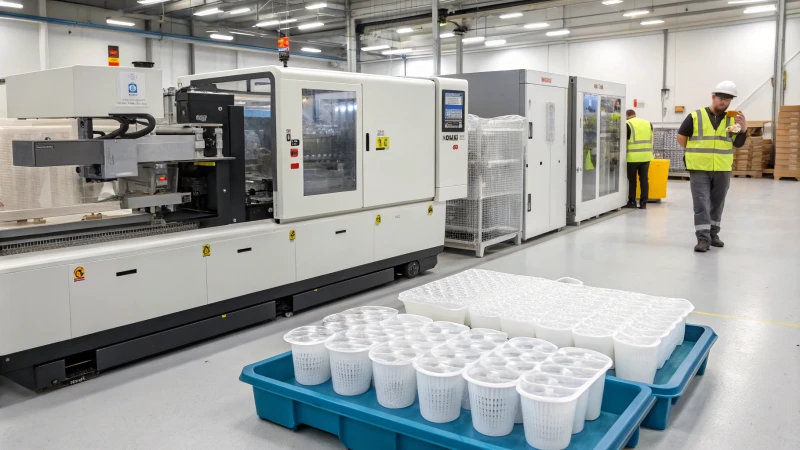
The Role of Temperature in Injection Molding
Temperature quietly shapes the outcome in injection molding. It acts like an unsung hero. People often focus on other technicalities while temperature performs its magic. I still remember my first time in the factory. I watched vibrant plastic granules change into useful parts. That transformation is fascinating. Isn’t it amazing how temperature plays such a starring role? Let’s explore how it works!
Injection Stage: Temperature and Pressure Dynamics
During the injection stage, temperature directly impacts both the injection pressure and speed.
As the molten plastic is injected into the mold, maintaining an appropriate temperature is vital to ensure that it flows smoothly and fills the cavity without cooling too quickly.
This balance between temperature and pressure is critical:
- Injection Pressure: Higher temperatures often lead to lower viscosity, allowing for easier filling of complex mold designs. However, if the temperature is too high, it can lead to flash or overflow issues.
- Injection Speed: Faster injection speeds are typically required for thin-walled products to prevent premature cooling. An optimal temperature setting helps achieve this speed without compromising quality. Explore injection molding techniques2.
Press Holding and Cooling Stages: Temperature Management
Once the mold is filled, press holding pressure ensures that any shrinkage during cooling is compensated for.
Here, temperature management is again vital:
- Press Holding: The duration of press holding is influenced by the thermal properties of the plastic material and wall thickness. Thicker walls retain heat longer, which may require extended holding times to achieve uniform density.
- Cooling: The cooling stage utilizes channels that circulate a cooling medium to remove heat from the plastic. The efficiency of this process depends significantly on the thermal properties of the material.
For example:
| Property | Impact on Cooling Time |
|---|---|
| High Thermal Conductivity | Faster Cooling |
| Low Thermal Conductivity | Slower Cooling |
Insufficient cooling may lead to deformation post-demolding, while excessive cooling increases cycle times and reduces efficiency. Check out cooling techniques3.
Conclusion Stage: Mold Opening and Demolding Considerations
The final phase involves carefully opening the mold once the product has cooled sufficiently. This step must be managed to avoid damaging the product, especially when dealing with intricate designs.
Temperature considerations must be kept in mind to ensure that the product retains its shape and strength during demolding. An optimal balance throughout all stages will enhance overall production efficiency and product quality. Discover best practices in demolding4.
Higher temperatures reduce viscosity in injection molding.True
In injection molding, increased temperatures lower the viscosity of molten plastic, facilitating easier flow into complex molds.
Cooling time is unaffected by the thermal conductivity of materials.False
The thermal conductivity of materials significantly influences cooling time; higher conductivity leads to faster cooling rates during injection molding.
What Are the Common Materials Used in Injection Molding?
Injection molding involves science and creativity. Many common materials are part of this process. Let’s explore these materials together!
Injection molding commonly uses thermoplastics (e.g., polypropylene, polyethylene), thermosetting plastics (e.g., epoxy resins), and elastomers (e.g., silicone). Each material’s unique properties suit specific applications, and designers select materials based on project requirements.
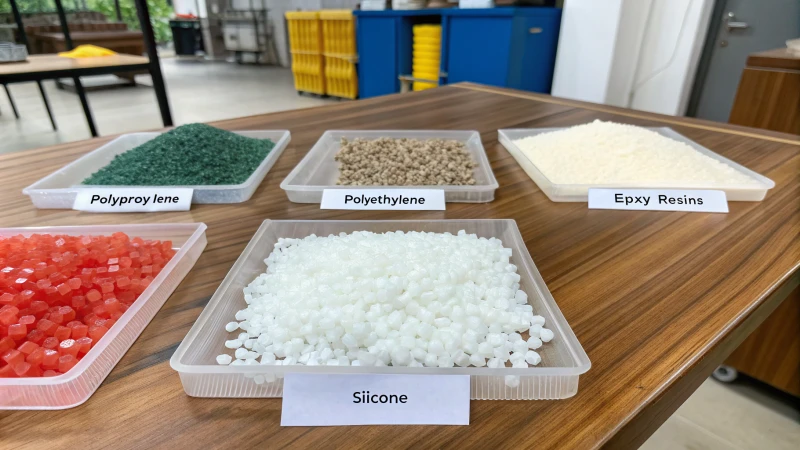
Common Materials in Injection Molding
I often admire how injection molding creates detailed parts with great precision. Material choice is very important. It affects both the function and the appearance of the finished product. Over time, I have learned about the typical materials used in this process:
-
Thermoplastics
These are very flexible materials. They allow reshaping many times, making them versatile. Some of my preferred choices include:- Polypropylene (PP): This material helps in different automotive designs. It resists chemicals and stress well. I once worked on a consumer product where PP greatly improved durability.
- Polystyrene (PS): A cost-effective option that remains strong and rigid, commonly used for packaging and disposable items. It is truly the unnoticed hero in many projects.
- Polyethylene (PE): This comes in high-density (HDPE) and low-density (LDPE) forms, used in a wide range of applications from creating strong containers to playful toys.
-
Thermosetting Plastics
Unlike thermoplastics, thermosets cannot be remolded after they are set, providing superior durability and heat resistance. Two types I often trust are:- Epoxy Resins: This material excels in electronic component design due to its excellent adhesion and chemical resistance, acting like a strong glue that holds things together.
- Phenolic Resins: Perfect for projects requiring high strength and thermal stability; I used phenolic resins for car parts demanding such reliability, and they performed wonderfully.
-
Elastomers
Working with elastic materials like rubber is satisfying; they fit perfectly for seals and gaskets. Two materials I favor include:- Thermoplastic Elastomer (TPE): This material mixes the benefits of rubber and thermoplastics, making it ideal for applications with a soft touch that give products a premium feel.
- Silicone: Known for heat resistance and flexibility, silicone is a regular choice in my toolkit; it is especially useful for medical devices and kitchenware as it adapts to various needs.
Material Selection Criteria
When selecting materials for injection molding, consider the following factors:
- Durability: The material needs to last through time; understanding the product’s use is crucial.
- Cost-Effectiveness: Balancing performance with budget matters a lot, especially for large-scale manufacturing.
- Production Volume: Some materials excel in high-volume production due to their processing traits.
| Material Type | Advantages | Common Applications |
|---|---|---|
| Thermoplastics | Recyclable, versatile | Consumer products, automotive parts |
| Thermosetting Plastics | High strength, heat resistance | Electrical components |
| Elastomers | Flexibility, resilience | Seals, gaskets |
Processing Considerations
The material selected will influence various stages of the injection molding process:
- Raw Material Preparation: The journey always starts with preparation; thermoplastic granules are poured into the hopper where they flow into the barrel to heat up beyond their melting point—captivating! Different plastics melt at different temperatures usually between 180 to 260℃.
- Injection Stage: Here’s where real magic unfolds! When plastic reaches the right temperature and fluidity, it injects into the mold like a painter applying colors—pressure guarantees perfect fill!
- Press Holding Stage: After filling pressure secures everything as it cools; time spent here varies by wall thickness ranging from seconds to minutes.
- Cooling Stage: Cooling involves more than just waiting; cooling channels perform critical work solidifying plastic while keeping its shape—correct cooling prevents deformations after demolding.
- Mold Opening and Demolding Stage: Once cooled, watching a perfectly formed product emerge feels like unwrapping a gift every single time!
Understanding these common materials lets me optimize designs resulting in products that not only look appealing but work well too! Want to explore each material type further? Check out our comprehensive guide5.
Thermoplastics can be reshaped multiple times during injection molding.True
Thermoplastics are versatile materials that can be reheated and remolded, making them ideal for various applications in injection molding.
Thermosetting plastics can be remolded after setting.False
Unlike thermoplastics, thermosetting plastics cannot be reshaped once set, providing durability and heat resistance for specific applications.
How Can Design Influence the Injection Molding Cycle?
Design greatly transforms the injection molding cycle. It influences more than just how things look. It changes efficiency and quality significantly. Now let’s explore how smart design choices affect this process deeply.
Design significantly influences the injection molding cycle by affecting material choice, injection speed, cooling times, and demolding efficiency, leading to better quality and cost-effective production. This optimization enhances project success and smoothness.
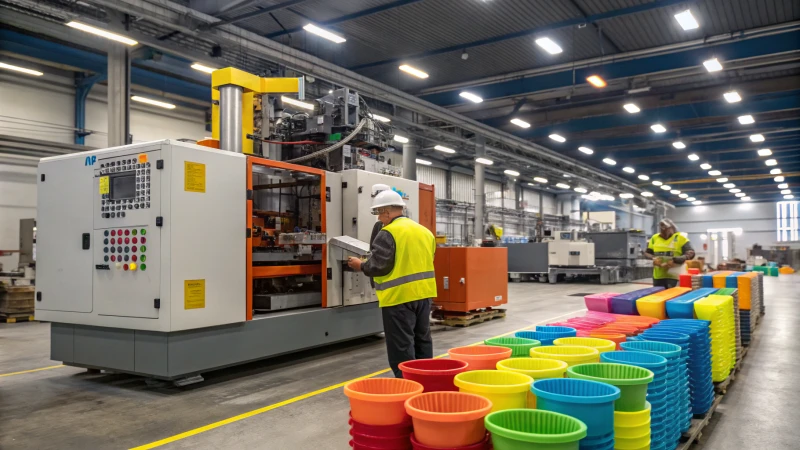
Understanding Design’s Role in Injection Molding
Design is the core of injection molding. It isn’t only part of the process; it is fundamental. Every decision, from choosing materials to shaping molds, affects all stages of production. Good design simplifies operations and improves product quality. Let’s discover this journey, step by step, and understand how design choices really uplift the injection molding process.
Raw Material Preparation Stage
The design of the part determines the type of raw materials that will be used. For example, thermoplastics such as polystyrene (PS) and polycarbonate (PC) have different melting temperatures. Understanding these properties allows designers to choose suitable materials that ensure optimal flow and filling during the injection phase.
| Material Type | Melting Temperature (℃) |
|---|---|
| Polystyrene (PS) | 180-240 |
| Polycarbonate (PC) | 220-260 |
Furthermore, the design can influence how well the granules flow into the barrel, which is crucial for achieving uniform melting. A well-designed hopper can facilitate better material flow, leading to a more efficient process.
Injection Stage
During the injection stage, the design affects how the plastic melt enters the mold. The configuration of the runner system and nozzle size can dictate the injection pressure and speed required for effective filling. For instance, thin-walled designs necessitate a higher injection speed to avoid cooling and defects.
- Key Design Considerations:
- Runner design: affects flow dynamics.
- Nozzle size: influences injection speed and pressure.
Designing an optimal runner system can minimize waste and improve cycle times, making it essential for designers to consider these factors in their designs.
Press Holding Stage
The duration and pressure applied during the press holding stage are also influenced by design. Thicker wall sections may require longer holding times to ensure uniform density and accurate dimensions. Designers need to account for these variables to optimize their designs for production efficiency.
| Design Feature | Effect on Holding Time |
|---|---|
| Wall Thickness > 5mm | Longer holding time required |
| Wall Thickness < 5mm | Shorter holding time possible |
Cooling Stage
Cooling times can vary based on part design and material properties. A well-designed cooling channel within the mold can significantly reduce cycle times while ensuring that parts solidify properly without warping. Designers must consider:
- Cooling channel placement: Affects heat removal efficiency.
- Cooling medium used: Water or oil can yield different cooling rates.
Mold Opening and Demolding Stage
Finally, design choices impact how easily parts can be demolded. Features such as draft angles and ejection mechanisms must be carefully planned to prevent damage during this phase. The right design can facilitate smooth demolding, reducing cycle time and improving overall efficiency.
| Design Element | Importance |
|---|---|
| Draft Angles | Prevents sticking in molds |
| Ejector Mechanisms | Ensures clean ejection of parts |
In conclusion, every aspect of the injection molding cycle is influenced by design choices. From selecting appropriate materials to optimizing mold features, a thoughtful approach to design can enhance efficiency, quality, and cost-effectiveness throughout the entire process.
Design affects raw material selection in injection molding.True
The choice of design directly influences which raw materials are suitable for the injection molding process, impacting efficiency and product quality.
Cooling channel design does not impact cycle time.False
A well-designed cooling channel is crucial for reducing cycle times and ensuring proper solidification of parts in injection molding.
What Are the Challenges Faced During the Injection Molding Process?
Injection molding is a very interesting process. It does have hurdles. I have encountered many of these problems myself. Knowing these challenges is crucial for those producing high-quality plastic parts.
Injection molding challenges include inconsistent raw material preparation, injection pressure management issues, inefficient cooling, and mold opening complications. Overcoming these is crucial for producing high-quality plastic parts.
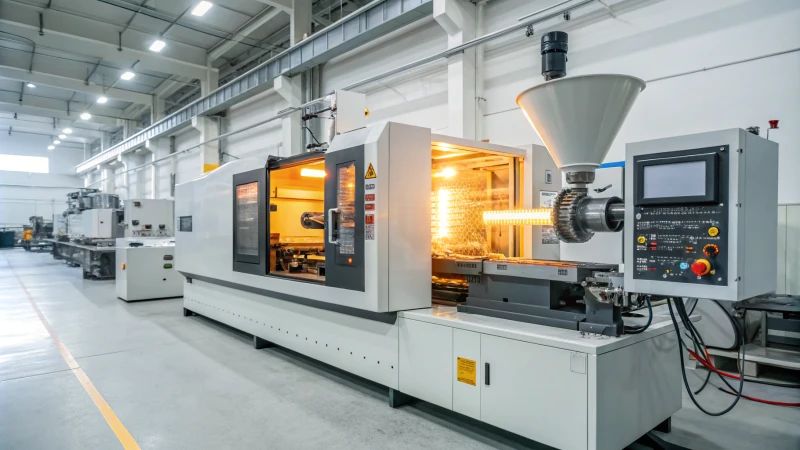
Raw Material Preparation Challenges
Success begins with the right materials. In injection molding, your thermoplastic granules must be top quality. A significant challenge here is ensuring that the granules are of uniform quality and composition. I once used polystyrene (PS) that wasn’t ready, which was like a nightmare because it didn’t melt correctly at 180-240℃. Variations in material properties can lead to inconsistent melting behavior, resulting in defects in the final product. Changes in material properties can cause flaws in the final product. This lesson was tough to learn. If granules lack consistent quality and composition, melting becomes unpredictable. That’s when trouble starts.
Injection Stage Challenges
After we prepare the material, we move to the injection stage. This part is critical as maintaining optimal injection pressure and speed is crucial. I’ve seen how important these factors are; for instance, low pressure caused short shots where the mold cavity didn’t fill completely, which was really disappointing. In contrast, excessive pressure could lead to defects like weld marks that made products look imperfect.
| Issue | Cause | Impact |
|---|---|---|
| Short Shots | Low Injection Pressure | Incomplete Mold Filling |
| Weld Marks | High Injection Pressure | Defective Appearance |
Press Holding Stage Challenges
After filling the mold, we enter the press holding stage. Finding the right holding time is tricky as it depends on material properties and wall thickness. Large parts need longer times for proper density while thin-walled products need shorter times to prevent overpacking. It’s like walking a tightrope; too much or too little time leads to failure.
Cooling Stage Challenges
Next is the cooling stage, another vital phase where problems can arise if cooling circulation is poor, leading to uneven cooling that causes warping or size changes, ruining all our efforts. I often struggle to find the best cooling time while balancing factors such as thermal conductivity and wall thickness:
- Thermal Conductivity: Materials with high thermal conductivity cool faster.
- Wall Thickness: Thicker walls necessitate longer cooling times.
Mold Opening and Demolding Challenges
Finally, we reach mold opening and demolding—a stage that has challenged me many times. Problems may occur if the ejector mechanism fails or if a part sticks to the mold; it’s very discouraging when hard work gets thwarted. Proper design of the mold is essential to avoid these issues—considering draft angles can minimize friction during demolding.
In summary, each stage of injection molding presents unique challenges that must be addressed for success. I’ve faced these hurdles and know how crucial preparation is for optimal production efficiency. For more about injection molding, you might explore best practices in injection molding6.
Uniform quality of granules is crucial for injection molding success.True
Inconsistent granule quality leads to defects in melting behavior, impacting product quality.
High injection pressure always results in better mold filling.False
Excessive pressure can cause weld marks, leading to defective appearances in products.
How Does Maintenance Impact the Performance of Injection Molding Machines?
Do you ever think about how a bit of care changes the work of injection molding machines? Let’s explore the core of maintenance and learn its vital part in production success.
Regular maintenance of injection molding machines prevents breakdowns, ensures consistent product quality, and extends machine lifespan, thereby enhancing overall performance.
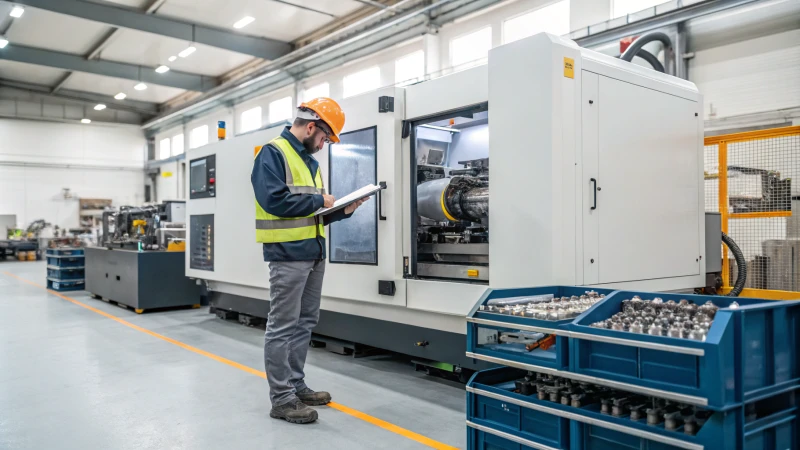
Understanding Maintenance and Its Importance
When I joined the injection molding industry, I quickly realized that maintenance is crucial for machine performance. It’s not just a task to check off but the core of smooth operations. Regular maintenance keeps machines running efficiently and prevents problems during critical production times. Imagine having a tight deadline and dealing with a machine breakdown due to neglect. That’s a situation I try to avoid at all costs.
-
Frequency of Maintenance: Following the manufacturer’s advice and watching machine use help a lot. Daily tasks like lubricating moving parts prevent bigger problems in the future. Monthly or quarterly inspections provide peace of mind.
-
Preventative vs. Reactive Maintenance: I strongly support proactive maintenance. It’s like knowing the steps in a dance to avoid trouble. By preventing issues early, costs decrease and production stays smooth.
The Impact on Raw Material Preparation
Raw material preparation is the first crucial step in our process. Neglecting machines here leads to uneven heating and melting of plastic granules, causing major issues in the final product.
| Maintenance Action | Impact on Performance |
|---|---|
| Regular calibration of temperature settings | Ensures uniform melting temperatures, improving flow and consistency of the melt. |
| Cleaning of the hopper and barrel | Prevents contamination and clogs that could disrupt material flow. |
I once dealt with a batch of products that had issues due to a clogged hopper from lack of cleaning. Routine checks are vital to avoid this problem!
Injection Stage Performance
In the injection stage, maintenance is vital as it combines precision and power. Poor maintenance results in defects like short shots or weld marks.
- Key Maintenance Tasks:
- Inspecting and replacing worn screws or barrels.
- Keeping the injection nozzle free from obstructions.
These tasks help machines fill molds accurately and efficiently, enhancing quality products which are a designer’s pride.
Press Holding Stage Efficiency
The press holding stage relies on consistent pressure application. A neglected hydraulic system is like using a leaky bucket to hold water; dimensional inaccuracies in products can occur if pressure isn’t steady here.
| Maintenance Task | Consequence of Neglect |
|---|---|
| Regularly checking hydraulic fluid levels | Low levels can lead to insufficient pressure, causing dimensional inaccuracies in molded products. |
| Inspecting seals and fittings for leaks | Leaks can reduce efficiency and increase operational costs. |
Trust me, keeping pressure steady here is essential! A small mistake affects the entire production line!
Cooling Stage Dynamics
Don’t forget about cooling; it’s crucial to prevent product deformation after demolding. A poorly maintained cooling system causes uneven cooling leading to warped products, which is undesirable.
- Cooling System Maintenance:
- Regularly clean cooling channels for optimal flow.
- Monitor temperatures to ensure they stay within desired ranges.
I’ve experienced cooling problems due to neglected channels; it’s a lesson I learned the hard way.
Mold Opening and Demolding Stage
The mold opening stage is the reward for all our efforts! Proper maintenance of the mold clamping mechanism is essential because wear leads to damaged products and longer cycle times.
- Essential Maintenance Actions:
- Lubricate moving parts to prevent sticking or jamming during mold opening.
- Check ejector mechanisms for wear and damage.
Prioritizing these tasks ensures a smooth production process for my team and me.
Regular maintenance not only improves machine performance but also extends their lifespan while optimizing production efficiency, benefiting everyone involved! For further insights into best practices for maintaining injection molding machines, consider exploring this guide7.
Regular maintenance prevents unexpected breakdowns in machines.True
Consistent maintenance reduces the risk of machine failures, ensuring uninterrupted production and minimizing costly downtime.
Poorly maintained machines lead to high-quality product defects.True
Neglecting maintenance can cause issues like uneven heating, resulting in defects such as short shots or weld marks in molded products.
Conclusion
Explore the detailed stages of plastic injection molding, highlighting raw material preparation, injection, cooling, and demolding while emphasizing design and maintenance’s role in ensuring product quality.
-
Explore in-depth guides on injection molding components to enhance your understanding and improve your design processes. ↩
-
Explore advanced techniques in injection pressure management influenced by temperature settings. ↩
-
Find out how cooling techniques can enhance your injection molding operations effectively. ↩
-
Learn demolding strategies that take temperature into account for better product integrity. ↩
-
Explore a detailed list of materials used in injection molding to enhance your knowledge for better project decisions. ↩
-
Clicking this link will provide valuable insights into overcoming common challenges faced during injection molding, enhancing your manufacturing knowledge. ↩
-
Discover essential maintenance tips that can boost your injection molding machine’s performance and efficiency. ↩


