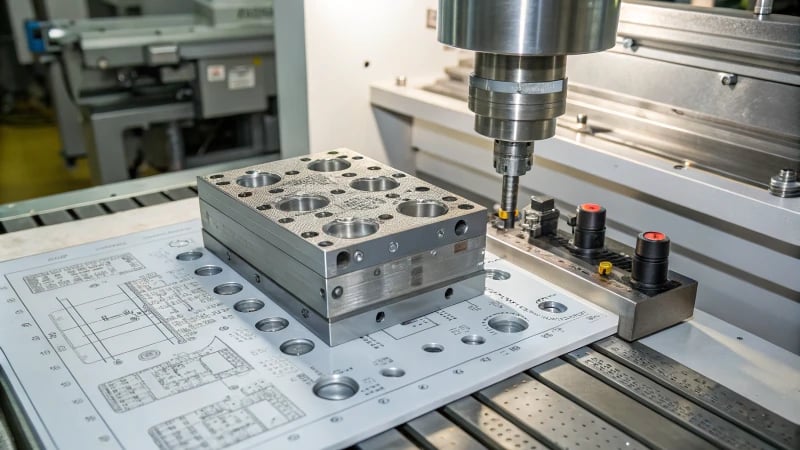
Figuring out the ideal spot and size for the gate in injection molding transforms your product’s quality. Locating the gate precisely affects the final product. Correct positioning and size prevent defects and improve appearance. Finding this balance is crucial.
To decide where the gate goes, look at how the material flows evenly, steer clear of obstacles and meet looks requirements. The gate size should match the product size and how easily the material flows to fill the cavity evenly and cut down on flaws.
When I first explored the world of injection molding, I focused deeply on adjusting gate positions. The right spot lets the plastic melt fill the cavity without problems. Gates placed near the center or in symmetrical areas of complex shapes allow even distribution. Some areas do not lack plastic while others have too much. Multi-cavity molds need a well-planned runner system for steady filling at the same time.
Avoiding obstacles in the melt flow is really important. Gates close to thin areas or spots where air could get trapped lead to partial fills or air pockets. Picture molding a plastic box – putting the gate right in front of a closed cavity traps air, causing defects. Sudden changes in flow direction raise resistance and create weld marks.
Looks matter too. If how something looks is important, like in car parts, gates go in hidden spots. Transparent products need gates placed so they do not mess with clarity or cause visual problems.
Gate size depends on product size and wall thickness. Big gates fit large or thick items, while small gates are better for thin pieces to speed up melt flow. Balance is necessary – not too small or resistance gets too high. Material flow influences choices. High-fluidity plastics like PE or PP need small gates. Less fluid ones require big gates to reduce resistance.
These lessons have helped refine my designs, leading to products that always meet quality demands and client hopes. Consistently meet every time.
Gate location affects melt flow balance.True
Correct gate placement ensures even filling of complex shapes.
Smaller gates are used for thick-walled products.False
Thick-walled products require larger gates for better flow.
How does melt flow balance affect gate location?
Some plastic products look perfect, while others do not. Melt flow balance and gate placement really determine this outcome.
Melt flow balance influences gate location through even spread of the molten material. This helps reduce defects. It also optimizes fill times. Proper gate placement looks at melt path uniformity. It avoids flow obstacles. It really improves product beauty.

Importance of Melt Flow Balance in Injection Molding
In injection molding, melt flow balance is vital for creating high-quality products. Think of pouring syrup on a waffle; uneven syrup leaves some parts dry, others soaked. Melt flow balance means the molten plastic spreads evenly in the mold, reducing defects like weld lines1 and air pockets.
Determining Optimal Gate Location
1. Consider Melt Flow Balance:
- Imagine designing a product with complex shapes, like ribs and bumps. Overfilled or underfilled areas must be avoided. Placing the gate in the center or a symmetrical spot helps the melt spread like ripples in water. Important to avoid imbalance.
- Multi-cavity molds are like serving dinner; all guests need their food at once. Symmetrical gates help each cavity fill simultaneously.
2. Avoiding Melt Flow Obstacles:
- Gates should not be near thin walls or places trapping air, just like not spilling coffee on a laptop. Proper gate placement avoids defects.
- Sharp changes in flow direction are like hitting a speed bump too fast. Gate positions should encourage smooth flow.
| Factors | Considerations |
|---|---|
| Complex Shapes | Center or symmetry-based gating |
| Multi-Cavity Molds | Symmetrical gate distribution |
| Thin Walls | Avoid gating too close |
Improving Product Appearance
Aesthetics truly matter. Gate placement is key. For strict appearance needs, hide gates in less visible areas or spots easy to process later. For car interiors, hide gates on edges to minimize their look.
Transparent plastics need care for clarity. Gates must not cause stress or lines, keeping the material clear.
By understanding these elements, designers can optimize mold configurations, enhancing both functional and aesthetic aspects of the final product. Check more on mold design strategies2 for further insight.
Gate location affects melt flow balance in molds.True
Proper gate placement ensures even distribution of plastic melt, avoiding defects.
Larger gates are ideal for thin-walled products.False
Thin-walled products require smaller gates to increase shear rate and reduce viscosity.
What Obstacles Should Be Avoided in Gate Placement?
Imagine this꞉ You’re busy with a project and the location of the gate is causing problems. It’s annoying, right? Let’s look at typical mistakes to stay away from.
To prevent problems in gate placement, balance the melt flow. Stay away from areas with thin walls. Control gas entrapment well. Consider the product’s appearance to meet requirements. These steps probably lead to the best manufacturing results.

Finding the Right Gate Spot
Ensuring a balanced melt flow3 is crucial. I recall my first challenge with gate location. The shape was tricky, and I needed to ensure the melt moved smoothly. Central gate placement gave an even fill and cut down on fill-time differences. This showed me how vital a steady melt flow is, particularly with molds having many cavities. Symmetrical gate design with runners transformed my results.
Avoiding Obstacles in Melt Flow
Gates near thin walls may cause incomplete filling due to rapid cooling. Once, a gate near a thin wall led to incomplete filling due to quick cooling. I quickly learned to avoid such spots and areas likely to trap air, like closed cavities or deep grooves, to prevent air pockets. Filling gently from the outside became a trusty tactic to stop defects.
Sudden shifts in melt flow direction were surprising; they hiked up resistance and left unwanted weld marks. For products that bent, like sharp corners, strategic gate placement for smooth flow proved essential.
Meeting Appearance Demands
In one project where appearance quality mattered most, positioning gates in hidden spots or places easy to process later became crucial. For car parts, placing gates on unseen edges preserved the look.
For transparent plastics, sidestepping areas affecting optical clarity was key. Keeping gates away from spots that might dull transparency or twist the view was a lifesaver several times.
Picking the Right Gate Size
Gate size confused me initially but depends on product dimensions and wall thickness. Bigger products or thick walls called for larger gates for enough melt to pass while thin walls did better with smaller gates, helping with shear rate and lessening viscosity.
Plastic material fluidity became part of my process. Materials like PE and PP suited smaller gates while PC and PA needed bigger ones to ease flow resistance. Rheological tests helped me decide wisely by studying the melt’s viscosity-shear rate plot.
Quick Reference Tables
| Product Type | Ideal Gate Location | Gate Size Recommendation |
|---|---|---|
| Complex Shapes | Center/Symmetrical | Larger for thick walls |
| Multi-Cavity Molds | Balanced Runner System | Adjust based on material fluidity |
| Thin-Walled Items | Away from thin areas | Smaller for increased shear rate |
| Transparent Plastics | Avoid optical areas | Based on rheological properties |
Grasping these points has empowered me to perfect gate placement, really lifting product quality and production efficiency while avoiding typical errors. Delving into how melt flow balance4 impacts various materials and products is my next step toward truly mastering gate design.
Gate location affects melt flow balance in complex shapes.True
Proper gate location ensures even cavity filling, preventing underfilled areas.
Thin-walled products require larger gate sizes for better flow.False
Thin-walled products need smaller gates to achieve higher shear rates and quick filling.
Why Is Product Appearance Important in Gate Design?
Think about a moment when something grabbed your attention simply because it appeared attractive. That’s the strength of good design, especially in creating gates for injection molding. Design matters. Good design matters a lot.
Product look in gate design matters a lot because it not only improves how it looks but also helps the product work properly. Right gate placement and size help avoid flaws. This improves the product’s appearance and reliability. Consumer satisfaction goes up.

Balancing Looks and Function
I recall my first task at the mold factory. The project involved designing a sleek gadget cover. Balancing the design’s appearance and how it actually worked was essential. In injection molding, both looks and function matter. Gate design5 plays a key role. Gates serve as hidden paths for plastic melt, and their placement affects a product’s appearance and strength.
Important Points:
- Gate Location: Early on, I discovered that hiding gates could prevent future issues. Placing them on the underside of car parts makes the top look smooth and neat.
- Melt Flow: It’s intriguing how correct gate placement stops flow lines that ruin the finish. It’s like letting chocolate spread evenly in a candy mold.
| Criteria | Considerations |
|---|---|
| Gate Location | Hidden areas, ease of post-processing |
| Melt Flow Balance | Even filling, avoiding blemishes |
Influence on Consumer View
Product appearance can drastically alter people’s feelings about it. Once, we had to create a transparent part for a client. Any small gate mark would shout "cheap!" We were really careful in planning the gate design.
Factors Impacting Views:
- Gate Marks: Visible gate marks often deter people. Picking a hidden spot can keep quality perception high.
- Clarity and Finish: For clear items, avoiding gates that affect transparency or lead to distortions is crucial.
Advanced Gate Design Methods
Designers often use advanced methods to guarantee products look and work at their best:
- Balanced Runner Systems: These help each cavity fill properly, maintaining consistent quality.
- Rheological Testing: This lets us choose the right gate size so the melt flows smoothly and appears great.
These strategies help the final product6 fulfill its purposes while also impressing consumers with its look. It’s about providing more than just an item – it’s about surpassing expectations and being noticeable in the market.
Gate location affects product's appearance quality.True
Proper gate placement minimizes visible marks, enhancing aesthetics.
Larger gate sizes are preferred for thin-walled products.False
Thin-walled products need smaller gates for better melt flow.
How Does Material Fluidity Influence Gate Size?
When I first explored injection molding, one truth stood out꞉ material movement is vital for ideal gate size. The flow of the materials influences everything. Very crucial aspect.
Material flow greatly affects the choice of gate size in injection molding. High-flow materials need smaller gates, whereas low-flow materials call for larger gates. Larger gates help lower flow resistance. Proper filling follows.

Understanding Material Fluidity
I remember my first time watching plastic melt flow during injection molding7. It looked like a river of molten color. Knowing how it moves is very important. Material fluidity refers to how easily the melted plastic flows, depending on polymer type, heat, and additives. Higher fluidity allows it to slide through the gate with little pressure.
Gate Size Considerations
High Fluidity Materials
Imagine using polyethylene (PE) and polypropylene (PP). These materials slide through small gates easily, reducing waste. A smaller gate increases shear rate, lowering melt thickness for a smooth finish. It’s like pouring syrup instead of thick molasses.
| Material Type | Typical Gate Size (mm) |
|---|---|
| Polyethylene (PE) | 0.5 – 1.5 |
| Polypropylene (PP) | 0.5 – 1.5 |
Low Fluidity Materials
Now think of polycarbonate (PC) or polyamide (PA). These need larger gates to reduce flow resistance, filling every corner perfectly without flaws.
| Material Type | Typical Gate Size (mm) |
|---|---|
| Polycarbonate (PC) | 2 – 3 |
| Polyamide (PA) | 2 – 3 |
Rheological Testing
Rheological testing has changed my work by providing information on viscosity and shear rates, which guides gate size choices. This data is extremely useful for improving mold performance, as designers agree.
Practical Application
Finding the best gate size requires balance between material properties and part specifications. Large trash cans might use gates around 3-5mm, while a slim phone case may need only 0.5 to 1.5mm.
Impact on Mold Design
In mold design, knowing how material fluidity and gate size work together is key for ensuring efficient production and high-quality output. Fine-tuning these reduces defects and improves product looks, meeting both functional and aesthetic needs.
To fully understand this dynamic relationship8, you need to think about melt flow balance and runner design.
Gate location affects melt flow balance.True
Proper gate placement ensures even melt distribution, preventing defects.
Smaller gates are ideal for thick-walled products.False
Thick-walled products need larger gates for sufficient melt flow.
Conclusion
Determining gate location and size in injection molding is crucial for product quality, ensuring balanced melt flow, avoiding defects, and meeting aesthetic requirements for various materials and designs.
-
Clicking this link offers an in-depth explanation of how weld lines occur during molding and how to minimize them. ↩
-
Explore this link for comprehensive strategies on enhancing mold design with optimal gate placement. ↩
-
Learn why balanced melt flow is vital for even filling and avoiding defects in molded products. ↩
-
Discover the role of melt flow balance in ensuring product consistency and minimizing defects. ↩
-
Understanding aesthetics’ role can help designers improve product appeal, crucial for market success. ↩
-
Exploring this topic provides insights into achieving high-quality molded products through strategic design. ↩
-
Learn about the basics of injection molding to understand the significance of gate size. ↩
-
Explore how melt flow balance influences efficient mold design. ↩


