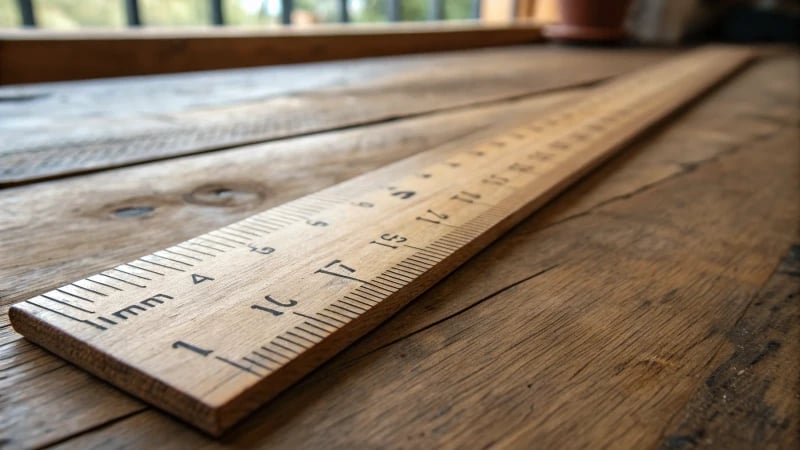
Imagine the simplicity of a plastic ruler and the complex process behind its creation.
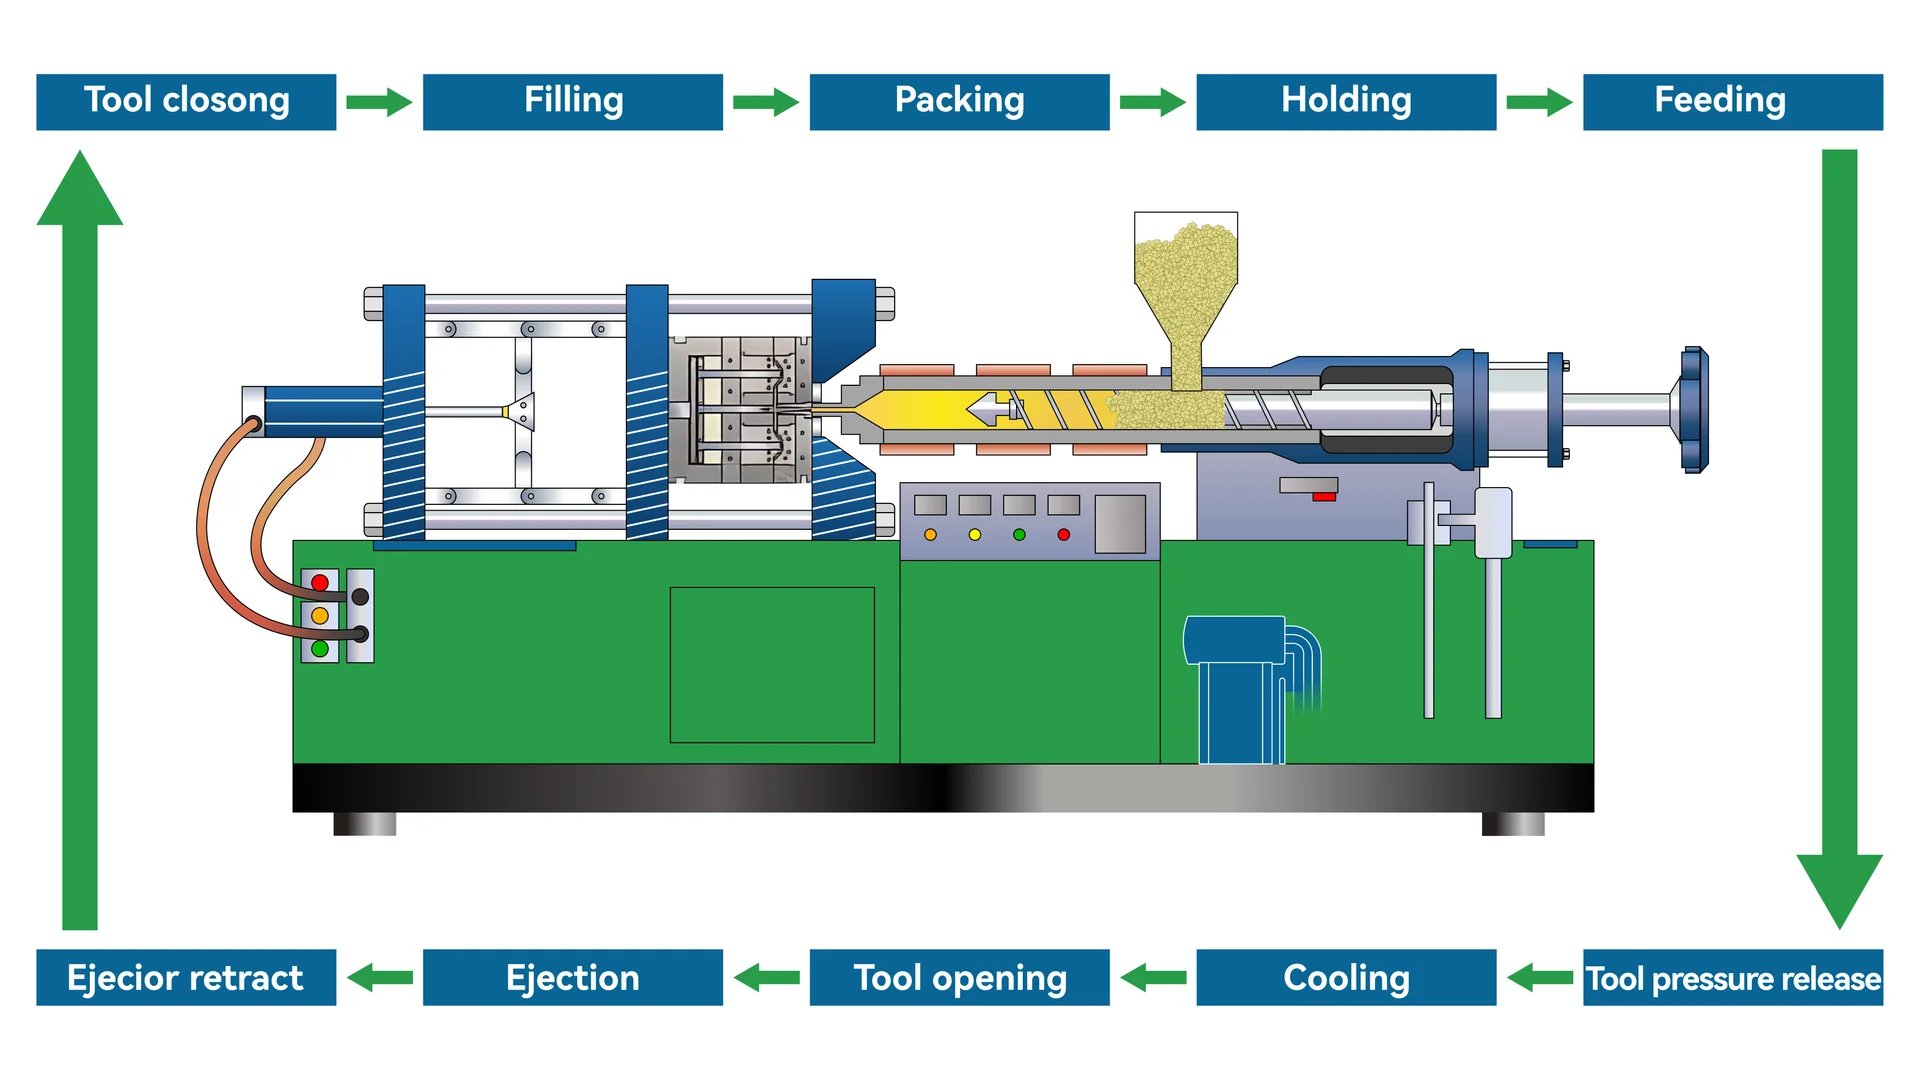
Injection molding machines create rulers by melting thermoplastic, injecting it into a mold, cooling, and ejecting the final product.
At first glance, manufacturing a ruler might seem like a straightforward task, but there’s a lot more beneath the surface. Each step of the injection molding process must be executed with precision to ensure every ruler meets quality standards. Let me take you through this intricate journey from raw materials to a finished product.
I remember my first encounter with a custom-made mold, designed to shape a simple ruler. It’s fascinating how these molds aren’t just any random shape—they’re meticulously crafted with precise engravings for numbers and graduations. These details are not merely decorative; they play a crucial role during the molding process.
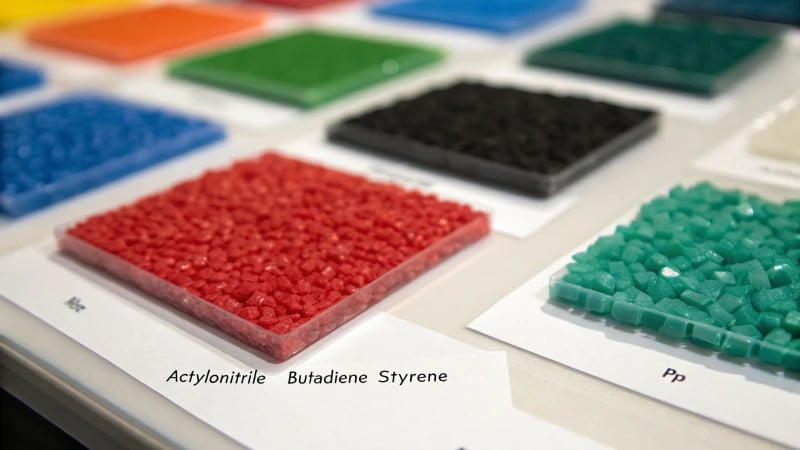
Choosing the right material is another vital part of the process. Thermoplastics like ABS or polypropylene aren’t just selected on a whim. I learned that ABS offers the hardness and durability needed to keep a ruler in top shape while polypropylene adds a touch of flexibility and chemical resistance.
Once the material is selected, it’s all about feeding it into the machine, melting it down, and injecting it into the mold cavity under high pressure. This step is where science meets art—ensuring the mold is filled completely with minimal shrinkage requires both precise calculations and a touch of intuition.
And then there’s post-processing. Sometimes, even after careful molding, the rulers need extra attention—smoothing edges or enhancing markings can make all the difference between an average product and one that stands out.
This entire process is not just about making rulers; it’s about perfecting each detail to transform raw plastic into a tool that we all use, often without a second thought. It’s this blend of technical mastery and creative finesse that keeps me captivated in the world of mold design.
Injection molding uses thermoplastics for ruler production.True
Thermoplastics are commonly used in injection molding due to their ability to be melted and reshaped.
Mold design is irrelevant in ruler manufacturing.False
Mold design is crucial for ensuring the precision and quality of rulers.
- 1. What Makes Mold Design for Rulers So Important?
- 2. What Thermoplastic Materials Are Best for Ruler Production?
- 3. How Does the Injection Molding Process Work for Rulers?
- 4. How Can Post-Processing Enhance Ruler Quality?
- 5. Why Choose Injection Molding Over Other Manufacturing Methods?
- 6. Conclusion
What Makes Mold Design for Rulers So Important?
Ever thought about the unsung hero behind your trusty ruler? Let me take you on a journey through the fascinating world of mold design.
Mold design for rulers is crucial as it involves custom mold cavities, material selection, injection molding, and post-processing, ensuring rulers are produced with precision and durability.
Mold Design Elements
When I first delved into mold design, creating a custom mold cavity felt like crafting a piece of art. Imagine this: it’s like sculpting the ruler itself before it even exists! This cavity isn’t just about dimensions; it’s about etching those tiny, precise markings that make measurements accurate—like a secret recipe passed down through generations.
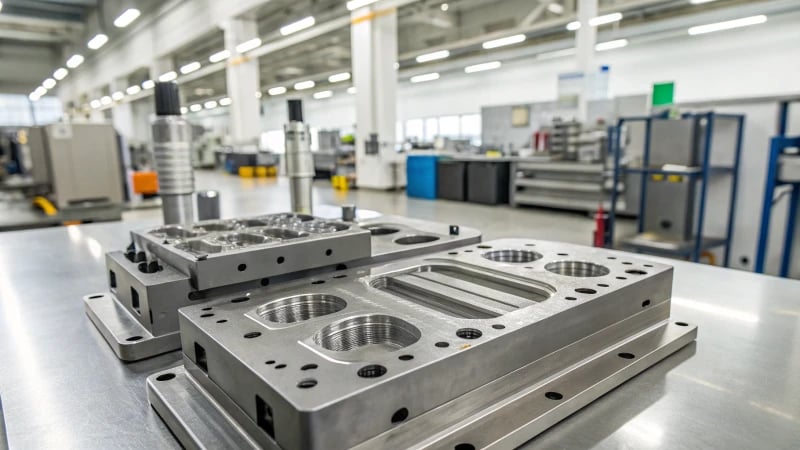
A custom-made mold cavity1 tailored to the ruler’s shape is essential. It includes a flat surface for measurements and detailed engravings for markings. These engravings are imprinted during the injection molding process, ensuring precise measurements.
| Mold Component | Description |
|---|---|
| Cavity Shape | Defines ruler’s dimensions and features. |
| Engravings | Marks for numbers and graduations. |
Material Selection
Choosing the right material is akin to selecting the best ingredients for a dish. Back when I was working on my first project, the decision between ABS and polypropylene felt monumental. ABS was like the tough, reliable friend who never lets you down, while polypropylene was the flexible companion ready for anything. Each brings its own magic to the table, whether it’s durability or adaptability.
Choosing the right thermoplastic material affects durability and flexibility. Acrylonitrile-butadiene-styrene (ABS) is favored for its hardness and durability2, while polypropylene (PP) offers flexibility and chemical resistance, ideal for varied applications.
Injection Molding Process
Picture an orchestra where plastic is the music. The injection molding machine conducts this symphony, where molten plastic flows into our meticulously crafted mold cavity. Holding pressure is our way of ensuring every nook and cranny gets filled, like making sure every seat in a theater is taken. The cooling phase then plays out as our masterpiece solidifies.
The plastic material is melted and injected under pressure into the mold cavity. Holding the pressure ensures complete filling, reducing shrinkage. Cooling solidifies the plastic, after which the mold opens to release the formed ruler.
Key Steps:
- Melting plastic
- Injecting under pressure
- Cooling and solidification
Post-Processing Techniques
Post-processing always feels like giving a final polish to a diamond. I remember smoothing out those rough edges on a ruler as if I were handling fragile glass. Enhancing markings is like adding a pop of color to a black-and-white photo—suddenly, everything comes alive.
Post-processing enhances clarity and safety of the ruler. Edges may be smoothed to prevent scratches, and unclear markings are enhanced through engraving3 or printing. This step is crucial for maintaining the ruler’s usability and appearance.
- Edge Smoothing: Prevents scratches.
- Marking Enhancement: Increases clarity with additional techniques.
Understanding these components has transformed my approach to design, making each ruler a testament to precision and quality. For more on the wonders of mold design, explore further techniques4.
ABS is preferred for ruler flexibility.False
ABS is favored for its hardness and durability, not flexibility.
Engravings ensure precise ruler measurements.True
Engravings are imprinted during molding to ensure accurate markings.
What Thermoplastic Materials Are Best for Ruler Production?
I still remember my first ruler—flimsy, cracked in no time. That’s when I learned how much the right material matters.
Acrylonitrile Butadiene Styrene (ABS) and Polypropylene (PP) are optimal for ruler production due to ABS‘s durability and precision, and PP‘s flexibility and chemical resistance.
Material Properties of ABS and PP
Diving into the world of thermoplastics for ruler production5, ABS was like a revelation to me with its impressive hardness and durability. I recall a project where a client’s rulers retained their shape perfectly through endless school days—thanks to ABS. On the flip side, Polypropylene (PP) brings flexibility and chemical resistance to the table, ideal for environments where these traits are paramount.
Comparison Table: ABS vs. PP
| Property | ABS | PP |
|---|---|---|
| Hardness | High | Medium |
| Flexibility | Low | High |
| Chemical Resistance | Moderate | High |
| Temperature Resistance | Moderate | High |
Injection Molding for Ruler Production
The injection molding process6 is the heart of ruler manufacturing. I can still picture the first time I watched molten plastic flow into a custom-designed mold. Seeing the hot liquid fill every detail of the ruler’s markings was mesmerizing. Once cooled, these rulers were like mini pieces of art—each precision-engineered to perfection.
Mold Design Considerations
Designing molds always feels a bit like solving a puzzle. Every detail counts. I once spent hours perfecting a mold design to ensure those tiny engraved markings came out clear, making measurements a breeze for users. Each line and number engraved into the mold cavity during the process added a layer of accuracy to the final product.
Post-Processing Techniques
I’ve learned that post-processing is often where good products become great. When I noticed some of our rulers’ markings were less visible, adding an engraving step made all the difference. Smoothing edges also became a crucial step to prevent scratches during use, ensuring each ruler not only looked but also felt professional.
By embracing these materials and techniques, I’ve helped create durable, precise rulers that meet diverse needs—from classrooms to laboratories. Understanding these properties and production methods lets us tailor our approach to achieve remarkable results.
ABS is more flexible than PP for rulers.False
ABS has low flexibility compared to PP, which is highly flexible.
Injection molding ensures ruler precision.True
Injection molding allows precise shaping and marking of rulers.
How Does the Injection Molding Process Work for Rulers?
Remember those days when rulers were more than just classroom tools, but the ultimate sword in epic schoolyard battles? Let’s uncover how these trusty companions are crafted through injection molding.
Injection molding for rulers entails creating a mold, using thermoplastics, injecting molten plastic, cooling, and possibly post-processing for a polished finish.
Understanding the Mold Design
I still recall my first encounter with a ruler’s precision, tracing those etched numbers with a curious finger. The injection molding machine7 brings such precision to life using a tailor-made mold, ensuring each ruler reflects exact measurements. The mold itself is a marvel, with engravings that create embossed markings, breathing life into what might otherwise be just a flat piece of plastic.
| Mold Features | Purpose |
|---|---|
| Mold Cavity | Shape and dimensions of the ruler |
| Engravings | Numbers and graduations |
Material Selection: ABS vs. PP
Choosing the right material reminds me of picking the perfect paper for an art project—each type lends a different quality. Acrylonitrile-butadiene-styrene (ABS), known for its toughness, makes for a ruler that stands the test of time and heavy use. On the other hand, polypropylene (PP) offers flexibility and resistance to chemicals, adapting beautifully to various uses, much like how we adapt our paths as life unfolds.
- ABS: Hard, durable
- PP: Flexible, chemical-resistant
The Injection Molding Process
Picture this: the excitement of watching cookie dough spread perfectly into the shapes of your favorite cookies. The injection molding process is similar, where thermoplastic material such as ABS or PP is heated and injected into a ruler-shaped mold cavity8. It’s held under pressure to ensure every nook and cranny is filled, then cooled to solidify. The anticipation is akin to waiting for cookies to cool before indulging.
Post-Processing Techniques
Once ejected, some rulers might need a little extra attention. This stage is like adding final touches to a homemade gift—smoothing edges and enhancing clarity of markings through additional engraving or printing. These steps ensure each ruler is as smooth as it is accurate, ready for its journey from the factory floor to being the trusty tool in your pencil case.
Exploring these steps reveals just how intricate the creation of something as straightforward as a ruler can be. Appreciating this process deepens our understanding of the precision and care that goes into manufacturing these everyday tools.
ABS is used for flexible ruler production.False
ABS is known for hardness and durability, not flexibility.
Post-processing enhances ruler markings.True
Post-processing can include additional printing or engraving to enhance markings.
How Can Post-Processing Enhance Ruler Quality?
Ever wondered how a simple ruler becomes an essential tool in your hands?
Enhance ruler quality by smoothing edges, improving markings via printing or engraving, and polishing the surface for better clarity and durability.
Importance of Post-Processing
In the world of manufacturing, particularly in injection molding9, post-processing is a critical step to refine the product. Rulers are no exception. After a ruler is formed using an injection molding machine, additional steps can significantly improve its utility and appearance.
It’s funny how something as straightforward as a ruler can undergo such a transformation with just a few post-processing tweaks. I remember the first time I saw the magic happen in a factory setting. The difference these steps make is like night and day.
Smoothing Edges
A crucial post-processing step is smoothing the edges of the ruler. This process involves rounding or beveling sharp edges to prevent user injuries and damage to other surfaces. Techniques include hand sanding or using specialized machinery to achieve a consistent edge finish.
When I think about edge smoothing, I flash back to the time I accidentally scratched a table with a ruler that had sharp edges. That’s when I realized the importance of this step.
Enhancing Markings
Markings on a ruler are essential for its function. If these markings are not clear after the molding process, they can be improved through various techniques:
- Printing: Utilizing ink or other materials to make markings more visible.
- Engraving: Deepening existing grooves or creating new ones for better contrast.
Both methods ensure that the ruler serves its purpose effectively.
I’ve had rulers where the numbers faded so quickly, it was like they were part of a disappearing act! To avoid this, we enhance them using either printing techniques or engraving.
Surface Polishing
Polishing the surface of a ruler can enhance its aesthetic appeal and provide additional protection against wear and tear. This step can be done using chemical polishes or mechanical buffers, resulting in a glossy finish that highlights details.
There’s nothing quite like the shine of a well-polished ruler. It’s not just about looks—although a glossy finish is undeniably attractive—but also about protecting it from everyday wear and tear.
Material Compatibility and Selection
Selecting the right material is foundational. ABS10 and polypropylene (PP) are commonly used for their durability and flexibility, respectively. Each material responds differently to post-processing steps, impacting the final product’s quality.
| Material | Feature | Best Post-Processing Method |
|---|---|---|
| ABS | Hardness | Engraving, Chemical Polishing |
| Polypropylene | Flexibility | Printing, Mechanical Buffing |
Together, these steps ensure rulers are not only practical but also look top-notch for everyday use in both personal and professional settings.
Exploring Advanced Techniques
Advanced techniques such as laser engraving can offer precise and durable marking solutions. Innovations in 3D printing11 are also opening new avenues for creating intricate designs on rulers with minimal post-processing needed.
I’ve seen how laser engraving can take things to the next level, offering precision and durability that’s hard to beat. Then there’s 3D printing, opening up exciting new possibilities for intricate designs with minimal fuss.
By mastering these post-processing techniques, manufacturers can produce rulers that check all the boxes—functional, visually appealing, meeting high industry standards.
Smoothing edges prevents ruler user injuries.True
Rounding or beveling edges reduces sharpness, minimizing injury risk.
ABS is preferred for its flexibility in rulers.False
ABS is known for hardness, not flexibility; PP is flexible.
Why Choose Injection Molding Over Other Manufacturing Methods?
Remember the days when your ruler snapped too easily? Injection molding might be the hero we need.
Injection molding excels in creating complex, precise shapes with high-repeatability and minimal waste, making it a cost-effective choice for mass production with diverse material options.

Benefits of Injection Molding
When I first dove into the world of injection molding, it felt like discovering a secret that everyone should know about—especially if you’ve ever been frustrated by a broken plastic ruler. The precision and capability to create intricate designs are nothing short of amazing. Imagine being able to include tiny details, like those essential measurement markings on a ruler, right in the mold itself. Each piece produced is a near-perfect replica of the last.
Table 1: Comparison of Key Features
| Feature | Injection Molding | Other Methods |
|---|---|---|
| Precision | High | Moderate |
| Cost Efficiency | Excellent | Variable |
| Material Waste | Low | Higher |
| Scalability | High | Moderate |
Material Versatility
One of the best parts? You get to play around with materials. I remember feeling like a kid in a candy store when I first got to choose between thermoplastics like ABS and PP for a project. ABS is tough and durable, perfect for items needing a bit more rigidity. Meanwhile, PP is flexible and resists chemicals, making it versatile for different uses.
Process Efficiency
Efficiency is key in this process. Once a mold is set up, you’re ready to churn out thousands of identical pieces with the consistency of your favorite coffee order. The automation involved12 means fewer hiccups and lower costs in the long run.
Sustainability Considerations
From a sustainability perspective, injection molding ticks many boxes. Less waste is generated because the process precisely controls material usage. Plus, many of these thermoplastics are recyclable, which is a win for both my conscience and the environment.
Practical Example: Ruler Production
Let’s talk rulers—a staple in any school bag or office drawer. An injection molding machine can work wonders here, using custom molds that ensure each ruler emerges with perfect measurements. Every detail, down to the engraved markings, is imprinted during the process.
The procedure involves melting your chosen thermoplastic and injecting it into a mold shaped like a ruler. As it cools, it retains every intricate detail from length to markings.
Future Prospects
Looking ahead, I’m excited about how 3D printing13 could complement injection molding rather than replace it. Rapid prototyping through 3D printing adds flexibility while we keep relying on injection molding for its mass-production prowess. Continuous innovations in mold design and materials science keep pushing the boundaries, expanding what we can achieve with this technique.
Injection molding produces less material waste than other methods.True
Injection molding minimizes excess and scrap, reducing material waste.
3D printing will soon replace injection molding entirely.False
3D printing complements injection molding for prototyping, not replacing it.
Conclusion
Injection molding machines create rulers by melting thermoplastics like ABS, injecting them into custom molds, and cooling them. Post-processing enhances durability and clarity of markings.
-
Learn how a custom mold cavity contributes to precision in ruler manufacturing. ↩
-
Discover why ABS is a preferred material for producing durable rulers. ↩
-
Explore techniques to improve clarity and visibility of ruler markings. ↩
-
Gain insights into innovative techniques improving plastic mold manufacturing. ↩
-
Learn why ABS is favored in ruler production due to its durability and mechanical properties. ↩
-
Understand how injection molding shapes thermoplastics into precise forms like rulers. ↩
-
Learn how an injection molding machine operates to create products like rulers. ↩
-
Understand the role of a mold cavity in shaping products through injection molding. ↩
-
Discover how post-processing refines molded products, crucial for quality enhancement. ↩
-
Learn about the strengths of ABS and polypropylene in manufacturing durable products. ↩
-
Explore cutting-edge 3D printing methods that minimize post-processing needs. ↩
-
Explore how automation enhances efficiency and reduces costs in the injection molding process. ↩
-
Discover how 3D printing may complement traditional methods like injection molding in future manufacturing landscapes. ↩