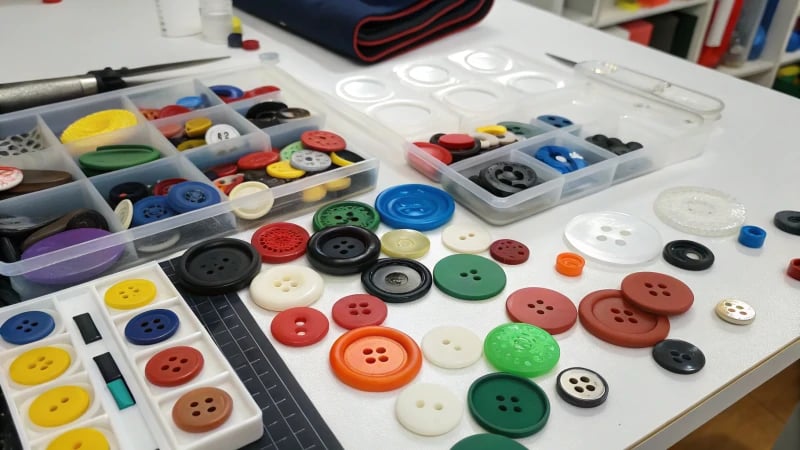
You know those trusty buttons on your favorite shirt? Ever wondered how they come to be?
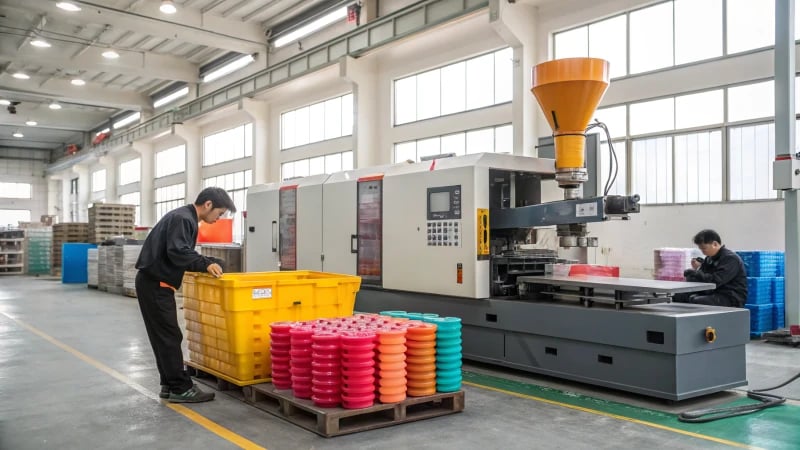
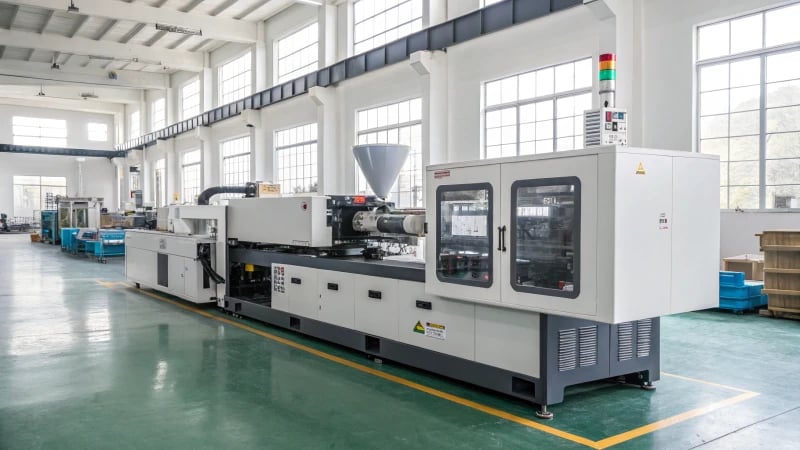
Injection molding machines create button molds by designing precise cavities, using materials like ABS or PP, and executing a process of melting, injecting, cooling, and ejecting the plastic.
I remember the first time I walked into a mold factory. The buzz of machines, the precise dance of metal and plastic—it was mesmerizing. Understanding mold design is crucial. The cavities must mirror the button’s shape perfectly, while ejector pins gently nudge the finished product out without a scratch. I learned that the material selection is just as important. ABS and PP are popular choices for their durability and finish. Watching the plastic melt and flow into molds felt like witnessing magic—the art of transforming simple pellets into functional beauty. And when those buttons finally pop out, cool and ready to adorn a new piece, there’s an undeniable sense of accomplishment.
Injection molding uses only ABS plastic for button molds.False
ABS and PP are commonly used, not just ABS.
Cooling is a step in the injection molding process.True
Cooling solidifies the plastic in the mold cavity.
Ever wonder how something as small as a button can hold so much design complexity?
Mold design is crucial in button manufacturing, determining the button’s appearance, ensuring size accuracy, and enhancing production efficiency through well-crafted cavities, ejection systems, and gates for uniformity.
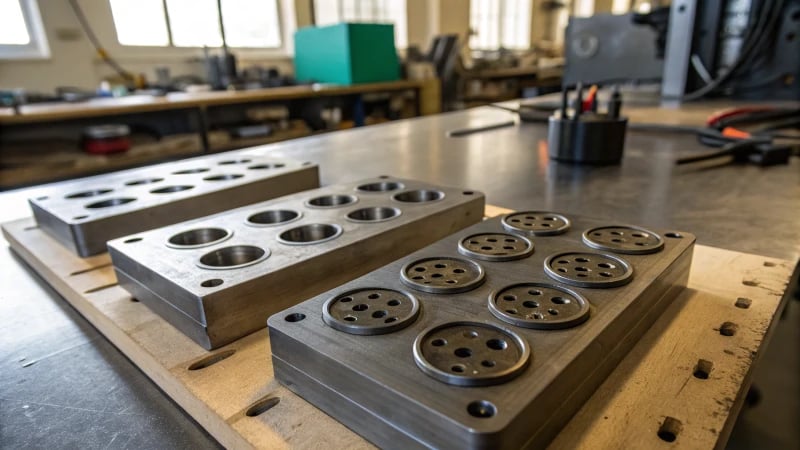
Importance of Cavity Design
I remember the first time I got a behind-the-scenes look at how buttons are made. It was like peering into a world of tiny precision. At the heart of this meticulous process is the cavity design. Imagine trying to sculpt a mini masterpiece that fits perfectly into its mold — that’s the essence of cavity design in button manufacturing. Each cavity is crafted to match the button’s intended dimensions and features. Whether it’s a simple circular button or a more complex shape, the cavity dictates the button’s form.
| Cavity Aspect | Function |
|---|---|
| Shape & Size | Determines button dimensions |
| Multi-cavity | Boosts production efficiency |
Multi-cavity molds are like a baker’s dozen but for buttons, allowing for multiple buttons to be formed at once, speeding up production and keeping things efficient.
Ejection System Considerations
An efficient ejection system is a lifesaver for those tiny buttons. I recall my mentor pointing out how ejector pins are like the gentle hands that carefully lift the buttons out without leaving a mark. These pins need to be strategically placed, often in less noticeable areas like the back of the button. It’s this attention to detail that ensures every button emerges unscathed and ready for use.
Role of Gate Design
The gate design in mold making is like finding the perfect spot for your favorite painting — it needs to be just right to avoid marring its beauty. By placing gates in less visible areas, mold designers can keep the front surface of each button blemish-free.
For more on injection molding principles1, understanding gate design’s impact is crucial.
Material Selection Impact
Choosing the right material is like picking the right fabric for a dress — it affects everything from durability to appearance.
| Material | Properties |
|---|---|
| ABS | Durable, easily colored |
| Polypropylene | Flexible, chemical-resistant |
Materials like ABS and Polypropylene bring different strengths to the table. ABS is durable and easily colored, while Polypropylene offers flexibility and chemical resistance. It’s fascinating how each material can enhance or alter the final product’s look and feel.
Explore thermoplastics suitable for buttons2 to see how material choices influence design.
Understanding Injection Molding Process
I always liken the injection molding process to a high-stakes cooking show — everything must be perfectly timed and measured. The plastic pellets are melted and injected into molds, much like ingredients in a recipe that must combine seamlessly to form something greater than their parts. Precision at each stage ensures consistent quality.
- Melting & Injection: The plastic is melted and injected under pressure to fill the mold cavities perfectly.
- Cooling & Ejection: Once filled, the plastic cools and hardens before being ejected smoothly by the ejection system.
Dive into how injection molding machines work3 for deeper insights into each stage of this process.
Each component of mold design contributes to crafting high-quality buttons efficiently and consistently. By mastering these factors, we can refine our approach, optimizing both resource use and product quality.
Multi-cavity molds reduce production time.True
Multi-cavity molds allow multiple buttons to be formed simultaneously, boosting efficiency.
ABS is not suitable for button manufacturing.False
ABS is durable and easily colored, making it ideal for button manufacturing.
Ever wondered why some buttons just feel better than others? It’s all about the plastic choice!
For button-making, ABS offers durability, polypropylene provides flexibility, and polycarbonate ensures strength. These plastics are ideal for injection molding, guaranteeing quality and efficiency.
Understanding Button Material Requirements
Selecting the right plastic is vital as it influences the durability4, finish, and cost of the final product. Let’s explore three popular plastics used in button production:
Acrylonitrile Butadiene Styrene (ABS)
- Properties: This is your go-to for a strong, flexible button that can take a bit of wear and tear. Its smooth finish is perfect for vibrant colors and detailed designs.
- Usage: Remember that time when I was trying to find the perfect button for a jacket? ABS was a lifesaver because it kept the aesthetics without sacrificing strength.
Polypropylene (PP)
- Properties: If you’re looking for something lightweight and resistant to chemicals, PP is your friend. It’s got that soft touch you need.
- Usage: Think about those cozy sweaters or outdoor gear—PP buttons make them feel just right.
Polycarbonate (PC)
- Properties: Need something tough as nails? PC is your go-to for high-impact resistance.
- Usage: I recall designing uniforms that needed to stand up to rough conditions; PC buttons were the perfect fit.
| Plastic Type | Key Property | Typical Use |
|---|---|---|
| ABS | Strength & Finish | Vibrant, polished buttons |
| PP | Flexibility | Garments with soft buttons |
| PC | Impact Resistance | Industrial applications |
Exploring Injection Molding Process
The process of making buttons often involves injection molding5, which efficiently produces high volumes. Here’s how it works:
- Mold Design: Every detail counts here. From cavity size to ejection systems, everything must be spot-on to avoid defects.
- Material Melting: I remember being amazed by the precision needed to heat those plastic pellets just right—especially with ABS, which melts between 200-260°C.
- Injection & Cooling: Timing is everything. The way molten plastic fills a mold and solidifies can make or break the final product.
Each step ensures that the buttons meet both aesthetic and functional requirements, as emphasized6 by mold experts. Understanding these materials and processes will help you produce high-quality buttons tailored to specific needs. Whether focusing on aesthetics or functionality, choosing the right plastic makes all the difference.
ABS buttons are ideal for vibrant colors.True
ABS offers a smooth finish, allowing easy coloring and polishing.
Polycarbonate is best for soft children's wear buttons.False
Polycarbonate is used for high-stress applications, not soft buttons.
Ever wonder how those little buttons on your shirt are made? Let me take you behind the scenes into the fascinating world of injection molding, where precision and creativity come together to make everyday objects truly remarkable.
The injection molding process for buttons involves molding with specified cavities, selecting plastics, melting and injecting them into molds, cooling, and ejecting. This enables large-scale, consistent production with precision.
Understanding Mold Design for Buttons
When I first learned about mold design, it felt like cracking a code. The mold for buttons is meticulously crafted to ensure it aligns perfectly with what we envision. Each cavity is like a tiny blueprint of the button itself. I remember standing in awe at the machine as it stamped out circular molds, each one a perfect match for the circular buttons we needed.
Ejection systems are just as fascinating. These ejector pins work like little fingers gently nudging the finished buttons out without a scratch. And let’s not forget about the gate design—it’s the unsung hero that keeps our buttons looking flawless by hiding marks on the less visible parts.
Selecting the Right Materials
Choosing the right material feels like picking the perfect ingredient for a recipe. I’ve experimented with various plastics, like acrylonitrile-butadiene-styrene (ABS) for its durability and smooth finish—ideal for buttons that need to look sleek. Then there’s polypropylene7 (PP), which I admire for its flexibility and chemical resistance. And for those sturdy buttons that require strength, polycarbonate (PC) does the trick.
| Material Type | Properties |
|---|---|
| ABS | Durable, smooth finish |
| PP | Flexible, chemical-resistant |
| PC | Rigid, high-strength |
The Injection Molding Process
-
Melting the Material: Feeding those plastic pellets into the hopper and watching them transform into molten magic at precise temperatures—like 200-260°C for ABS—is a mesmerizing part of the process.
-
Injection into the Mold: Once molten, it’s time for injection. It’s thrilling to see how the machine expertly channels this liquid into the mold cavities. I’ve spent countless hours fine-tuning pressure to ensure even distribution, especially crucial for our tiny button designs.
-
Cooling and Ejection: Finally, there’s a pause—the cooling phase. Patience is key here as we wait for the plastic to solidify. Once cooled, it’s showtime: The mold opens, and out pop perfectly formed buttons, ready to repeat this fascinating cycle.
For more detailed insights on designing molds for specific applications8, there are plenty of resources to explore.
ABS is used for its smooth finish in button molding.True
ABS is chosen for its mechanical properties and smooth finish.
Polycarbonate buttons are known for their flexibility.False
Polycarbonate is rigid, not flexible; PP offers flexibility.
You know that moment when a simple tweak makes all the difference? That’s what cooling does in button molding!
Cooling in button molding solidifies molten plastic, ensuring shape, quality, and durability, while impacting cycle time and energy efficiency, essential for defect-free buttons.
The Role of Cooling in Solidifying the Button
I remember the first time I witnessed the button molding process9. It was fascinating to see how the cooling phase played a pivotal role in ensuring each button came out just right. During this phase, the molten plastic solidifies within the mold, capturing every detail of its intended design. Proper cooling prevents issues like warping or incomplete filling—common hurdles if this step is rushed.
Impact on Production Efficiency
Balancing speed and precision is like walking a tightrope. On one hand, faster cooling means quicker cycle times, enhancing production efficiency. On the other, hasty cooling can lead to defects, which is something I’ve learned the hard way! Imagine waiting for a batch only to find imperfections—it’s a lesson in patience and precision.
| Parameter | Effect on Cooling |
|---|---|
| Mold Material | Conductivity affects speed |
| Cooling Channels | Design influences uniformity |
| Plastic Type | Different plastics have varying cooling needs |
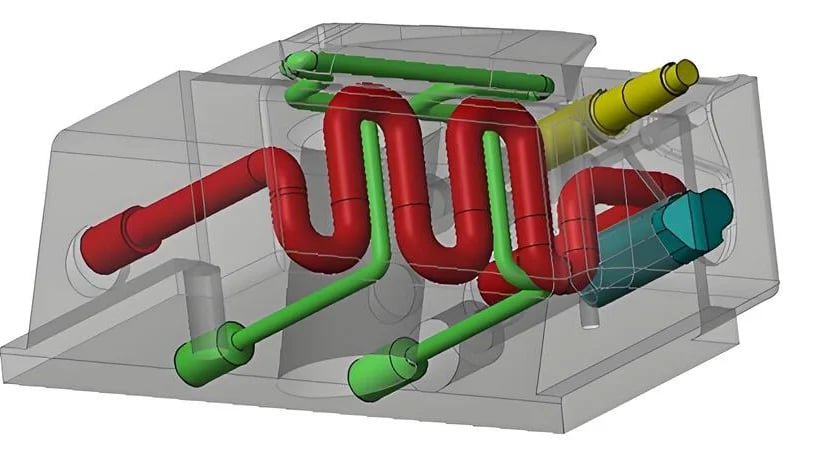
Design of Cooling Systems
Strategically designing cooling systems10 is an art form. In my experience, placing cooling channels correctly ensures even temperature distribution, avoiding hotspots that can mar a button’s surface. I’ve seen how uneven cooling can leave stress marks—something no designer wants.
- Example: Picture a button emerging with an uneven surface because of poor cooling design; it’s frustrating but preventable.
Energy Efficiency and Cost Implications
Effective cooling is not just about quality—it’s also about sustainability and cost savings. By fine-tuning the cooling time11, we can reduce energy consumption, cutting operational costs and lessening our environmental impact. Every adjustment helps lower our carbon footprint while maintaining high-quality production.
With these insights, professionals like Jacky can refine their button molding processes to balance aesthetics and functionality seamlessly. It’s about creating perfection with every press of the mold.
Cooling affects button molding cycle time.True
Proper cooling reduces cycle time, increasing production efficiency.
Uneven cooling leads to perfect button surfaces.False
Uneven cooling causes stress marks and irregular surfaces on buttons.
Ever wondered how the buttons on your favorite gadgets are made with such precision and consistency? It’s a fascinating process!
Ensure button quality and consistency through precise mold design, strategic material selection, and meticulous injection molding, ensuring reliable and visually appealing products.
Understanding Mold Design for Buttons
When I first delved into mold design, it felt like piecing together a complex puzzle. Imagine creating a button mold12 that needs to capture every tiny detail. It all begins with crafting cavities that perfectly match the button’s dimensions. The ejection system then comes into play, ensuring that each button pops out smoothly without a hitch. And let’s not forget about the gate design—those tiny gateways need to be perfectly placed to avoid any unsightly blemishes.
| Component | Function |
|---|---|
| Cavity Design | Matches button size/shape |
| Ejection System | Smooth removal of buttons |
| Gate Design | Minimizes surface blemishes |
Material Selection for Consistency
Ah, the joy of picking the right material! I remember standing in front of a shelf lined with plastic pellets, feeling like a kid in a candy store. There’s ABS for its smooth finish—perfect for those vibrant colors. Then there’s PP, the go-to for flexibility and chemical resistance, like a reliable old friend. And for those super-tough buttons, PC is the way to go.
- ABS: Smooth finish, easily colored
- PP: Flexible, chemical-resistant
- PC: High-strength, rigid
The Injection Molding Process Explained
Now, the injection molding process13—that’s where the magic truly happens. It starts with melting plastic pellets until they’re just right for injection into the molds. I’ve spent countless hours tweaking the temperature and pressure settings to get that perfect button every time. You’d be amazed at how these adjustments can transform the final product.
Process Steps:
- Melting: Pellets are melted in the machine.
- Injection: Molten plastic is injected into molds.
- Cooling: Plastic cools and solidifies before ejection.
Each step requires precision and care. By fine-tuning these processes, I can ensure that every button not only meets but exceeds quality expectations. For those eager to learn more about advanced techniques, diving into plastic injection molding advancements14 can be incredibly rewarding.
ABS buttons are highly flexible.False
ABS is known for a smooth finish, not flexibility.
Gate design minimizes surface blemishes in buttons.True
Strategically placed gates help reduce surface imperfections.
Conclusion
Injection molding machines create button molds through precise cavity design, material selection, and a multi-step process of melting, injecting, cooling, and ejecting plastic for efficient production.
-
Learn about gate design’s influence on product aesthetics and structural integrity. ↩
-
Discover which thermoplastics offer ideal properties for creating durable buttons. ↩
-
Understand the key processes involved in injection molding for efficient production. ↩
-
Discover why durability is crucial for ensuring buttons withstand daily wear and tear. ↩
-
Learn about injection molding’s efficiency in producing uniform, high-quality buttons. ↩
-
Explore how precise mold design enhances both aesthetic and functional button quality. ↩
-
Learn about polypropylene’s benefits in injection molding, including flexibility and chemical resistance. ↩
-
Explore detailed guides on mold design techniques to enhance understanding and application. ↩
-
Learn more about how buttons are molded using injection techniques. ↩
-
Discover effective strategies for designing cooling systems in molds. ↩
-
Find guidelines for determining ideal cooling times for different plastics. ↩
-
Learn how precise mold design improves button production efficiency and quality. ↩
-
Understand the essential steps to achieve uniform and defect-free buttons. ↩
-
Discover cutting-edge methods to further enhance production quality and efficiency. ↩