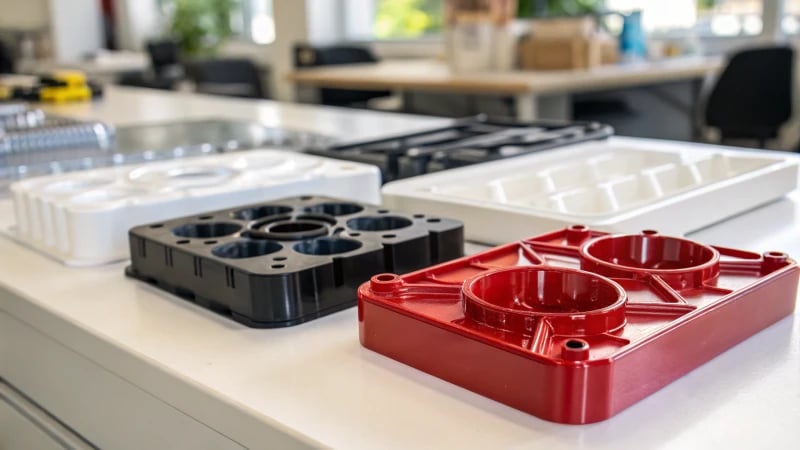
Knit lines can be a real headache in injection molding, compromising both the look and durability of your products.
Prevent knit lines in injection molding by optimizing mold design, adjusting process parameters, and selecting suitable materials. Control gate design, runner systems, exhaust setups, and manage temperature and pressure precisely to reduce occurrences.
Every time I dive into a new injection molding project, I remind myself of the basics—optimize mold design, tweak those process parameters just right, and choose materials wisely. But let me tell you, there’s so much more to it than just the basics. It’s like crafting a recipe where each ingredient plays a crucial role in perfecting the dish.
When I first started out, I remember the frustration of dealing with unsightly knit lines. They seemed like stubborn wrinkles on an otherwise smooth surface. Through trial and error, I found that adjusting gate design was like finding the right setting on an iron—smoothing everything out beautifully. And don’t even get me started on runner systems; balancing those was akin to tuning a guitar until every note was pitch-perfect.
Then there’s the art of managing temperature and pressure. Too high, and you’re risking degradation; too low, and you might as well be trying to pour molasses in January. It’s a delicate dance of finding that sweet spot where the melt flows just right. With time and practice, these strategies became second nature to me, transforming knit lines from an inevitable nuisance into a manageable challenge.
For anyone tackling this issue, remember that each tweak and adjustment brings you one step closer to mastering the craft. It’s all about patience and persistence—traits that have served me well throughout my journey in the world of molds.
Optimizing mold design prevents knit lines.True
Proper mold design ensures even material flow, reducing knit lines.
Knit lines strengthen plastic products.False
Knit lines usually weaken the structural integrity of plastics.

- 1. How Can Mold Design Prevent Knit Lines?
- 2. How Can Process Control Minimize Knit Line Formation?
- 3. How can you minimize knit lines in injection molding through material selection?
- 4. How does temperature adjustment affect knit lines?
- 5. How Do Injection Speed and Pressure Affect Knit Lines?
- 6. Conclusion
How Can Mold Design Prevent Knit Lines?
Imagine spending weeks perfecting a design only to find knit lines marring your final product.
Mold design prevents knit lines by strategically positioning gates and optimizing runner systems, ensuring smooth melt flow and minimizing defects.
I remember when I first encountered knit lines during an early project in my career. The frustration of seeing those unsightly lines ruin what was otherwise a perfectly crafted piece was a lesson in the importance of mold design. Since then, I’ve dived deep into the nuances of mold design to understand how crucial elements like gate placement and runner systems can make all the difference.
Gate Design Optimization
The gate design plays a pivotal role in mold design optimization1. Choosing the right gate position is essential. I once worked on a symmetrically shaped product where we placed the gates along the axis of symmetry, achieving a balanced melt flow that significantly reduced convergence issues. Reducing the number of gates can also help; in one instance, switching to a single-gate design eliminated persistent knit line problems. Submerged or scalloped gates can be a game-changer for products prone to these lines, smoothing the melt’s entry into the cavity.
Runner System Improvements
Runner systems are like highways for molten material, and their design is critical to uniform melt distribution. On one memorable project, balancing the runner system by adjusting its size and shape led to a flawless product, free from knit lines. Using CAE software2 for analysis helped us achieve this balance. Polishing the runner surfaces to a smooth finish reduced turbulence and further minimized defects.
Exhaust System Optimization
I can’t overstate the importance of a well-designed exhaust system. During a particularly challenging project, setting up adequate exhaust slots in strategic areas resolved gas accumulation issues that were disrupting melt flow. We even used breathable materials in areas where traditional venting wasn’t feasible, ensuring stable flow and reducing defects.
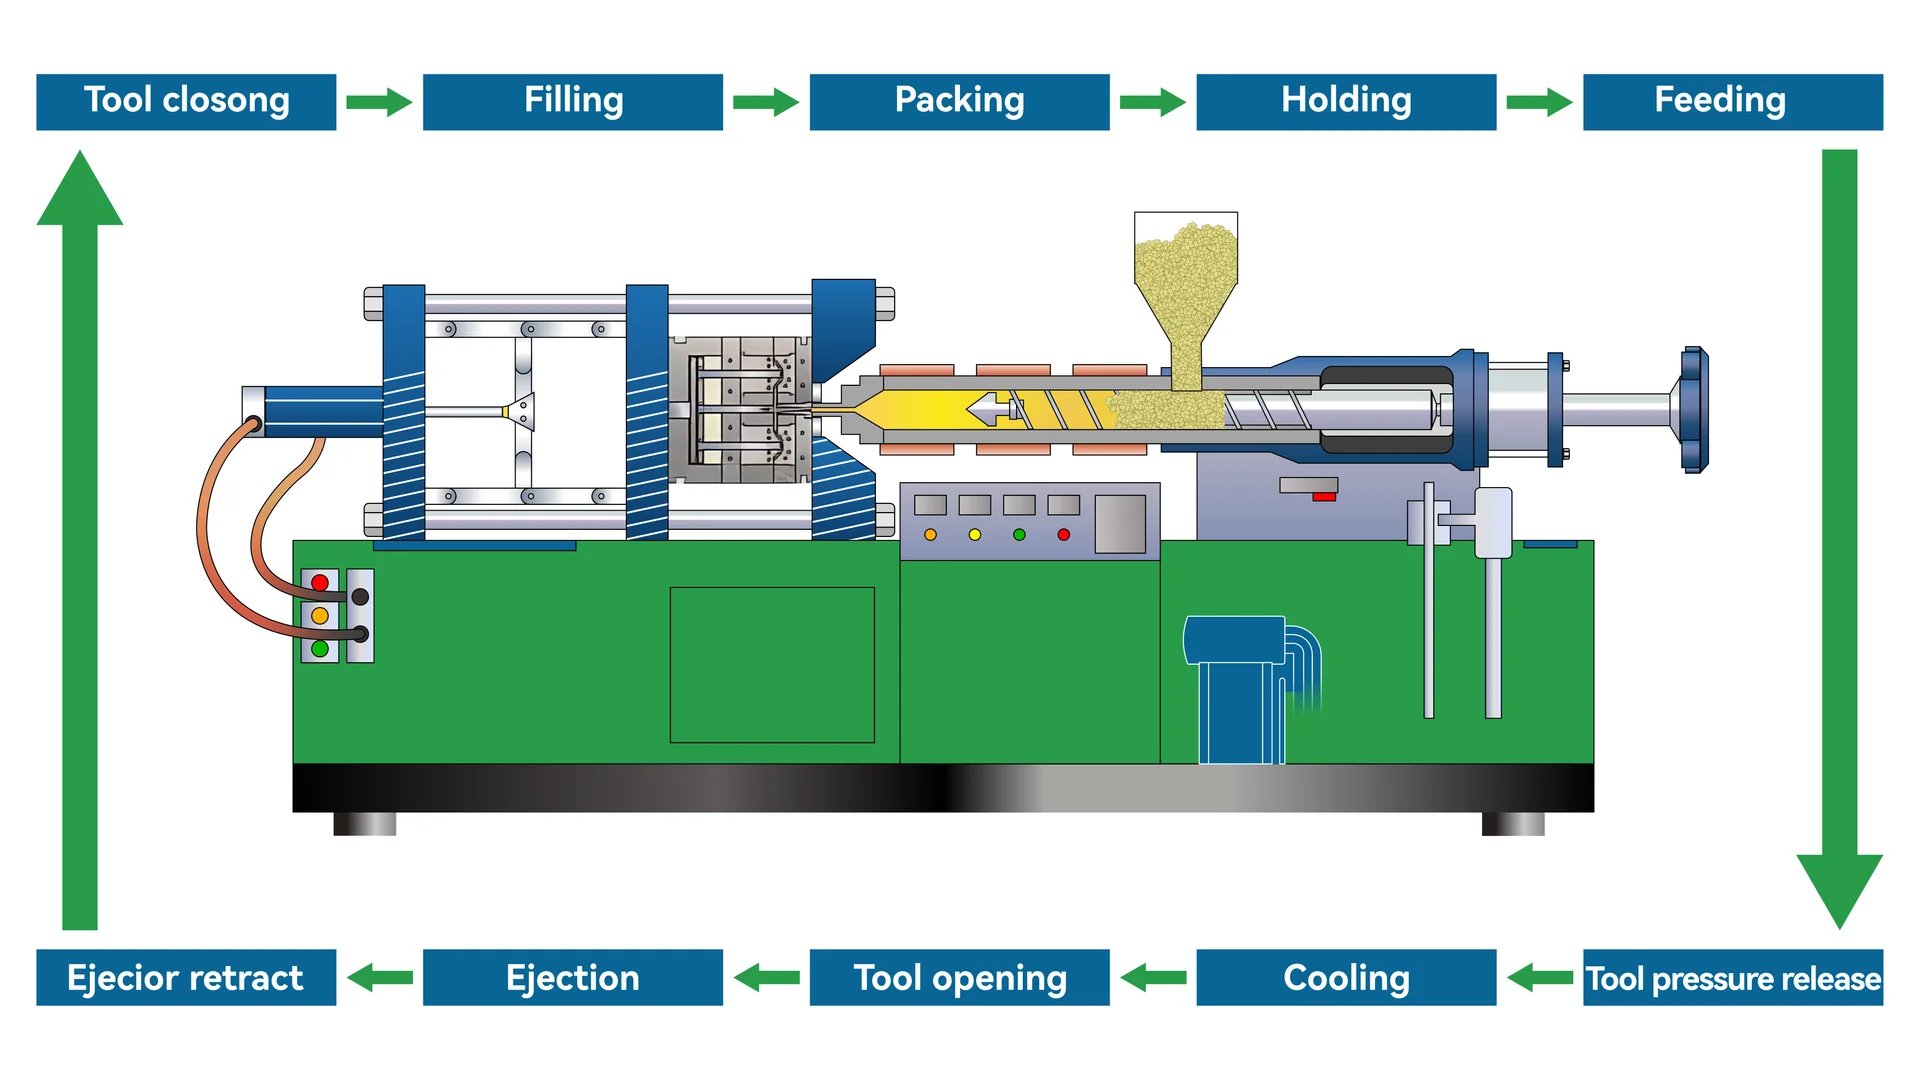
Injection Molding Process Control
Controlling the injection molding process is equally vital. Adjusting temperatures within optimal ranges can enhance melt flowability, as I discovered when working with polypropylene materials. Managing injection speed and pressure is crucial too; starting slow and making incremental adjustments based on observation helped us maintain even cavity filling and reduced defects.
| Parameter | Optimal Range | Notes |
|---|---|---|
| Injection Temperature | 180-220°C | Adjust based on material like PP |
| Injection Speed | Moderate | Start low; adjust as needed |
| Injection Pressure | Stable | Determine through trials |
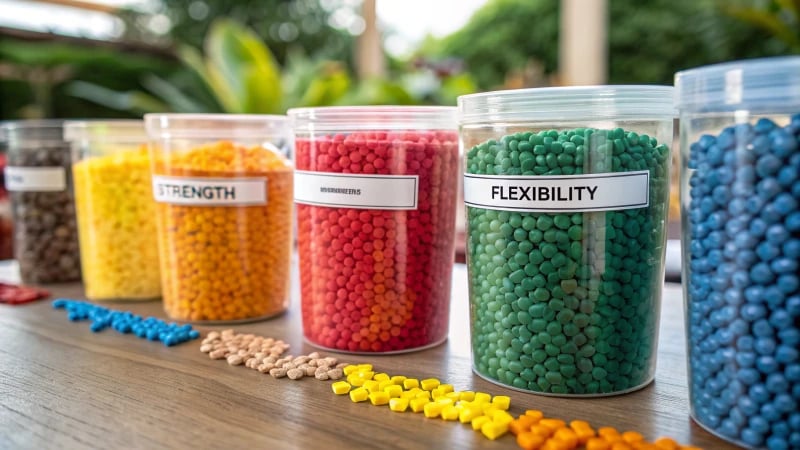
Choosing materials with good fluidity is also important, as is pretreating them properly to prevent issues like moisture absorption that can lead to knit lines.
Understanding these components has empowered me to refine mold designs that not only meet aesthetic standards but also ensure structural integrity, ultimately enhancing product quality and reliability.
Proper gate design reduces knit lines in molded parts.True
Optimizing gate position ensures even melt flow, minimizing knit lines.
High injection speed prevents knit line formation.False
Moderate injection speed is recommended to avoid melt collision and defects.
How Can Process Control Minimize Knit Line Formation?
Struggling with knit lines in your plastic parts? You’re not alone! Let’s dive into how process control can be your best friend in smoothing out those pesky defects.
Process control minimizes knit line formation by refining mold design, adjusting injection parameters, and selecting appropriate materials, ensuring consistent melt flow and improved product quality.
I remember the first time I noticed a knit line on a freshly molded part; it was like finding a run in a brand-new pair of stockings—frustrating and impossible to ignore. Knit lines can really undermine both the look and strength of plastic components, but with some savvy process control, they don’t have to be an unavoidable flaw.
Optimizing Mold Design
When it comes to reducing knit lines, optimizing mold design is a game-changer. Imagine trying to fill a cake mold unevenly—the result is going to be lumpy. Similarly, a well-thought-out mold design3 ensures the plastic melt flows smoothly, avoiding those dreaded knit lines.
Gate Design Adjustment
Choosing the right position for gates is like finding the perfect place for a coffee table—it just makes everything flow better. Positioning gates to allow even melt distribution across the cavity is crucial. I’ve seen symmetrical designs benefit hugely from gates placed on their axes of symmetry. Sometimes, opting for multiple gates can balance the melt flow beautifully.
- Number & Type: Less is often more when it comes to gates. A single-gate design can minimize convergence points effectively. Submerged or fan gates can also work wonders by letting the melt enter at a lower angle or spread evenly, reducing potential knit lines.
Runner System Improvements
A balanced runner system is like a well-organized highway network, ensuring smooth and equal distribution of traffic—in this case, the melt. Optimizing the runners’ size, shape, and length is essential to prevent uneven flow rates that cause convergence. Plus, polishing runners to a surface roughness of Ra0.8μm or less is like waxing your car for a smoother ride.
Adjusting Injection Molding Parameters
Fine-tuning injection molding parameters can really help tackle knit lines head-on.
Temperature Adjustment
Adjusting the temperature can be as vital as finding the right heat setting on your oven. Higher temperatures improve melt fluidity, helping it fill cavities uniformly. Just be sure not to crank it up too high, or you might end up degrading the material.
| Material | Recommended Temperature |
|---|---|
| Polypropylene (PP) | 180 – 220°C |
Speed and Pressure Control
Controlling speed and pressure is akin to driving—too fast or too slow can lead to problems. A slower injection speed can prevent melt collisions within the cavity. Pressure needs to be optimized to ensure the melt fills evenly without causing defects.
Material Selection and Handling
Picking materials with excellent melt flow properties and treating them right is just as crucial.
- Material Selection: Materials like polyoxymethylene (POM) with high fluidity are less likely to produce knit lines.
- Material Pretreatment: Drying hygroscopic materials such as nylon before molding improves quality.
Integrating these strategies helps in significantly reducing knit line formation. It’s all about enhancing quality and performance throughout production runs. For more insights on improving your injection molding process, check out injection speed4 and gate design5.
Optimizing gate design reduces knit line formation.True
Positioning gates for uniform melt flow minimizes convergence, reducing knit lines.
Higher injection speed prevents knit line defects.False
Slower injection speed is recommended to avoid melt collision and defects.
How can you minimize knit lines in injection molding through material selection?
Dealing with knit lines in injection molding can feel like tackling a stubborn stain on your favorite shirt—frustrating but necessary for a quality finish.
Select high-fluidity materials like polyoxymethylene (POM) and properly pretreat hygroscopic materials to minimize knit lines in injection molding.
Understanding Material Characteristics
I remember the first time I saw a product riddled with knit lines—my heart sank. It was a small gadget casing, something meant to be sleek and seamless, yet it looked like a patchwork quilt. That’s when I realized the importance of choosing the right materials. Engineering plastics like polyoxymethylene (POM)6 are incredibly helpful in these situations because they have excellent fluidity, which minimizes the risk of those pesky knit lines.
| Material Type | Fluidity Level | Molding Stability |
|---|---|---|
| Polyoxymethylene (POM) | High | High |
| Nylon (PA) | Moderate | Moderate |
Importance of Material Pretreatment
Once, I underestimated the power of moisture in nylon and ended up with a product that looked like it had been through a battle. Lesson learned—drying materials like nylon (PA)7 before molding is crucial. This extra step ensures that the materials flow smoothly and knit lines are kept at bay.
Enhancing Compatibility in Material Blends
Working with blends can feel like trying to mix oil and water if you’re not careful. Ensuring material compatibility8 is key to avoiding knit lines that might arise from poor integration during the molding process.
Leveraging Computer-Aided Engineering (CAE) Tools
I’ve found that CAE tools are like a crystal ball for predicting how materials will behave. Using flow analysis to guide material selection can prevent knit lines before they even start to form.
By focusing on these strategies, not only can you reduce the occurrence of knit lines, but you can also boost the overall durability and appearance of your molded parts. Don’t forget, improving mold design and process controls can make a world of difference too.
Polyoxymethylene has high fluidity and stability.True
POM is known for its excellent fluidity and stability, reducing knit lines.
Nylon requires no pretreatment before molding.False
Nylon is hygroscopic and needs drying to prevent moisture issues during molding.
How does temperature adjustment affect knit lines?
Ever wondered how a simple tweak in temperature could save your project from knit line disasters? It’s more impactful than you think.
Adjusting injection molding temperature affects knit lines by changing melt viscosity. Higher temperatures improve flow and reduce knit lines but risk material degradation, necessitating precise temperature control.
The Role of Temperature in Injection Molding
I remember one time when I was working on a critical project with tight deadlines. We were almost done, but the product was riddled with knit lines. That’s when I realized how crucial temperature adjustment is in injection molding. By carefully controlling the viscosity and flow of plastic melts through precise temperature settings, we managed to smooth things out. It was a game-changer.
Temperature and Viscosity: Just like adjusting the flame when cooking to get the perfect dish, increasing the injection temperature can lower the viscosity of the plastic melt. This allows it to flow more easily, filling the mold evenly and reducing those pesky knit lines that make your product look like it’s been through a battle.
Temperature Ranges for Different Materials
Each material has its own sweet spot when it comes to temperature settings. I once experimented with Polypropylene (PP) and found that keeping it between 180-220°C worked wonders for reducing knit lines. Here’s a quick reference for different materials:
| Material | Temperature Range (°C) |
|---|---|
| Polypropylene | 180-220 |
| Nylon (PA) | 240-290 |
| ABS | 200-250 |
Balancing Temperature with Mold Design
Temperature isn’t the only hero in this story. I learned the hard way that mold design also plays a vital role. Things like gate design and a balanced runner system ensure even distribution, which complements temperature adjustments perfectly. For instance, utilizing a balanced runner system9 has been a revelation for me in ensuring uniform melt flow.
Gate Design: Selecting the right position for gates is crucial. Whether it’s on symmetric axes or using multi-point gates, this choice can make or break your mold’s performance.
Potential Risks of Improper Temperature Settings
I recall an incident where we cranked up the heat too high, hoping to banish all knit lines once and for all. Instead, we ended up degrading the material, which was a costly mistake. High temperatures also demand more sophisticated cooling systems to manage cycle times effectively.
Integrating Temperature Control with Process Monitoring
These days, I rely heavily on advanced monitoring systems to keep an eye on temperature changes in real-time. This technology allows for dynamic adjustments that have drastically reduced defects and improved product consistency. Incorporating these strategies has not only enhanced quality but also streamlined production processes, keeping issues like knit lines10 at bay.
Increasing temperature lowers plastic melt viscosity.True
Higher temperatures reduce viscosity, improving flow and reducing knit lines.
Excessive heat always improves product quality in molding.False
Too much heat can degrade material, harming quality despite better flow.
How Do Injection Speed and Pressure Affect Knit Lines?
When I first learned about injection molding, the idea that speed and pressure could make or break a product blew my mind. Who knew these factors could decide the fate of knit lines in molded parts?
Injection speed and pressure significantly affect knit lines in injection molding. High speed can cause melt collision, while pressure influences cavity fill. Proper adjustments minimize defects.
Understanding Knit Lines
I remember the first time I encountered knit lines in a project. Knit lines, or weld lines as some call them, are the unsung villains of injection molding11, sneaking into our work when two flow fronts of melted material collide and harden without properly bonding. This can compromise both the look and durability of the part.
The Role of Injection Speed
Impact on Flow Behavior: Imagine trying to pour a thick milkshake through a straw. Push it too fast, and it splatters everywhere, right? That’s pretty much what happens with high injection speeds. The melted plastic rushes through the mold, causing turbulence and more knit lines. On the flip side, a slower pace allows for more graceful filling and fewer imperfections.
Speed Control Strategies: I’ve learned that starting slow pays off. It’s like easing into a morning jog rather than sprinting out of bed. Gradually increasing the speed lets me observe how the melt flows. It’s fascinating to see how minor tweaks, such as adjusting the gate design12, can fine-tune this process.
Pressure’s Influence on Knit Lines
Effect on Material Distribution: Pressure is like the gentle hand guiding the molten plastic into every nook and cranny of the mold. Too little pressure might leave gaps—like a poorly filled donut—but too much can worsen defects by making materials meet too quickly.
| Pressure Level | Potential Outcome |
|---|---|
| Low | Incomplete fill, possible voids |
| Moderate | Balanced fill, reduced knit lines |
| High | Increased defects, potential flash |
Pressure Control Techniques: Running mold trials feels like experimenting in a lab, finding that sweet spot where everything flows just right without overdoing it.
Material Considerations
Choosing the right materials has saved me from many headaches. Materials with good flow characteristics, like polyoxymethylene13, glide through molds like butter, minimizing knit line issues.
Integrating Mold Design Optimization
It’s all in the details. Optimizing mold design14 through strategic gate positioning and runner improvements is like crafting the perfect recipe to ensure even melt distribution.
Temperature Adjustments
I’ve found adjusting temperatures to be akin to adjusting the oven for baking. Lowering plastic viscosity makes everything flow smoother, yet overheating risks degrading material properties.
By mastering these elements, I’ve seen firsthand how manufacturers can tame knit lines and elevate product quality through the intricate art of injection molding.
High injection speed increases knit line formation.True
High speed causes turbulent flow, leading to more knit lines.
Low injection pressure prevents all knit lines.False
Low pressure may cause incomplete fill, not necessarily prevent knit lines.
Conclusion
Preventing knit lines in injection molding involves optimizing mold design, adjusting process parameters, and selecting suitable materials to ensure smooth melt flow and enhance product quality.
-
Discover expert insights on effective gate placement strategies to ensure even melt flow and reduce defects. ↩
-
Learn how CAE tools help optimize runner systems for uniform melt distribution and defect reduction. ↩
-
Discover expert insights on optimizing mold design to ensure even plastic flow, reducing convergence points that cause knit lines. ↩
-
Learn how to adjust injection speed effectively to prevent defects caused by fast melt collision. ↩
-
Explore best practices for gate design that help minimize knit line formation by ensuring balanced melt distribution. ↩
-
Explore why polyoxymethylene is preferred for its fluidity and stability in molding. ↩
-
Learn proper drying techniques for nylon to improve its molding properties. ↩
-
Find tips on selecting compatible materials to avoid knit line defects. ↩
-
Learn about balanced runner systems and their role in ensuring uniform melt distribution to minimize defects. ↩
-
Explore how temperature influences viscosity and impacts knit line formation, offering insights into optimal settings. ↩
-
Explore this link for a comprehensive understanding of how injection molding works, essential for addressing knit line issues. ↩
-
This link provides insights into optimizing gate design to control melt flow and reduce knit lines. ↩
-
Learn about polyoxymethylene’s fluidity and its benefits in reducing knit lines during molding. ↩
-
Discover strategies for optimizing mold design to enhance material flow and minimize defects. ↩