Have you ever tried shaping plastic and ended up more frustrated than successful? Let’s explore the usual problems that might upset the injection molding process.
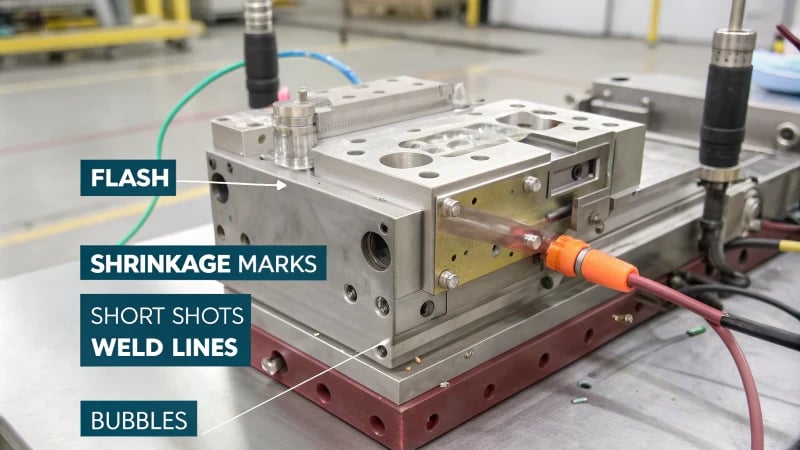
The most frequent problems in injection molding include flash, shrinkage marks, weld marks, bubbles and short shots. Incorrect pressure settings often cause these flaws. Uneven cooling or poor mold design also lead to issues. Both product quality and production efficiency suffer.
My first experience with injection molding problems felt like a puzzle missing key pieces. Understanding the main reasons for defects like flash or bubbles felt like a moment of sudden clarity. These defects need examination one by one to find simple solutions. This way, you improve your production process and save both time and money.
Flash is caused by excessive injection pressure.True
Excessive pressure forces molten plastic out of mold cavities, causing flash.
Shrinkage marks indicate perfect cooling conditions.False
Shrinkage marks occur when cooling is uneven or too rapid, not perfect.
- 1. What Does Flash Mean for Injection Molded Products?
- 2. What Causes Shrinkage Marks in Injection Molding?
- 3. What Causes Weld Marks in Plastic Components?
- 4. How Can Bubbles Be Prevented During Molding?
- 5. What Causes Short Shots in the Molding Process?
- 6. What Design Changes Can Minimize Injection Molding Defects?
- 7. Conclusion
What Does Flash Mean for Injection Molded Products?
Flash in injection molding is as troublesome as extra pizza dough spilling over a pan’s edge. Flash is not only an appearance issue but also affects how well parts fit together.
Flash occurs when too much plastic spills out during injection molding. This usually happens because of high pressure or small gaps in the mold. This extra plastic creates uneven edges. These uneven edges probably disrupt precise assembly.

Understanding the Causes of Flash
Picture a time when I was new in mold design. I was a bit younger, trying to understand why my lovely designs had ugly flash marks. After trying different things and many late nights, I found that flash, often called ‘overflow,’ happens when liquid plastic leaks through gaps in the mold1 during injection. Imagine baking a pie with the filling spilling out because the crust is overfull. It was good to know that changing injection pressures and having a tight mold fit helps stop this.
| Cause | Description |
|---|---|
| Excessive Injection Pressure | Causes plastic melt to overflow. |
| Insufficient Clamping Force | Allows plastic to escape through gaps. |
| Uneven Mold Parting Surface | Creates paths for overflow. |
Impacts on Product Quality
Flash can really ruin how a product looks. I saw it myself. In my early days, I remember sharp edges on a prototype made us spend hours fixing it. Not only does flash cause rough edges, but it also makes assembly harder. It’s like trying to fit puzzle pieces together when one piece has an extra tab.
| Impact | Description |
|---|---|
| Appearance Degradation | Results in uneven edges. |
| Increased Processing | Requires additional trimming. |
| Assembly Precision Issues | Affects how parts fit together. |
Addressing Flash in Injection Molding
Dealing with flash taught me that adjusting machine settings and improving mold design is key. Lowering injection pressure or increasing clamping force changes things greatly—like sealing every pie crust edge perfectly, keeping a smooth mold parting surface2 stops these leaks.
Regular mold inspections became my reliable method. Checking that everything matched well saved us many future problems. By focusing on details, our product quality got better and we reduced defects and costs.
Table: Common Defects in Injection Molding
This table was my helpful tool for diagnosing issues in molding. It reminded me that each change in settings or design could greatly affect our products’ success.
| Defect | Cause | Impact |
|---|---|---|
| Flash | High pressure, gaps | Uneven edges, assembly issues |
Flash results from excessive injection pressure.True
Excessive pressure causes plastic to overflow, leading to flash.
Flash improves the precision of molded products.False
Flash affects precision by creating uneven edges and fit issues.
What Causes Shrinkage Marks in Injection Molding?
Ever noticed those annoying small dents in plastic objects? People know them as shrinkage marks. These dents often cause problems during injection molding.
Shrinkage marks appear when plastic parts cool unevenly in injection molding. This situation leads to surface dents. Uneven wall thickness often contributes to these flaws. Inadequate pressure during holding also causes issues. Really, these factors matter a lot.

Understanding Shrinkage Marks
Shrinkage marks, often called sink marks, are imperfections that appear as depressions or "dents" on the surface of an injection molded product. They occur because the plastic contracts as it cools.
Causes of Shrinkage Marks
-
Uneven Cooling
I discovered the importance of cooling evenly during a late-night problem-solving session. Thicker parts of a mold stay warm longer than thinner ones, creating unwanted shrinkage marks.
Factors Impact on Cooling Wall Thickness Variation Slower cooling in thicker areas Mold Design Inadequate cooling channel layout -
Insufficient Holding Pressure
I learned about holding pressure the tough way. Not enough pressure during the holding phase almost always results in shrinkage marks. High pressure helps the liquid plastic fill every part of the mold, while low pressure allows it to relax too much.
- High holding pressure ensures that molten plastic fills all gaps, reducing the potential for sink marks.
- Low pressure might fail to keep the material compact, allowing shrinkage to form.
-
Material Choice and Properties
Different plastics shrink in various ways. Surprising, right? Picking a plastic that shrinks a lot without adjusting your process causes problems. Crystalline polymers, for example, shrink more than amorphous ones due to their molecular structure.
Tackling Shrinkage Marks
Solving these issues needs skill:
- Optimize Wall Thickness: Uniform thickness helps cool evenly.
- Adjust Holding Pressure: Find the right pressure for your material and mold to counteract shrinkage.
- Material Selection: Use materials that shrink less or change your process to suit them.
These tips helped me create not just functional but also nice-looking products. Designers can reduce defects and save effort later. In industries like electronics and cars, this is very important.
For more on molding challenges, look into other common issues3 like flash or weld marks. Knowledge improves quality and saves time.
Uneven cooling causes shrinkage marks in molded parts.True
Different cooling rates in part sections lead to shrinkage marks.
High holding pressure increases shrinkage mark formation.False
High pressure reduces shrinkage by filling gaps effectively.
What Causes Weld Marks in Plastic Components?
Ever wondered why those annoying weld marks show up on your beautifully crafted plastic parts?
Weld marks appear where flows of melted plastic join inside a mold, creating a visible line or a possible weak area. These marks often form near cores or inserts as the plastic flow splits and then meets again.

Understanding Weld Marks in Injection Molding
Weld marks form when two or more streams of melted plastic join together in the mold during injection molding. These lines appear because, as the flows meet, they may not completely bond due to varying temperatures and velocities, creating a visible seam. This can be especially prominent when molding complex shapes with reinforcing ribs or inserts.
Common Causes
- Obstacles in Mold: Think of directing traffic and a sudden block appears. When the plastic melt4 encounters obstacles like cores or inserts, it splits and then tries to come back together, potentially forming weld marks.
- Multiple Flow Fronts: Visualize a river with many streams joining into one. In molds requiring multiple injection points, different flow fronts can merge, leading to weld marks if not properly managed.
| Cause | Description |
|---|---|
| Obstacles | Flows diverge around inserts, recombining poorly |
| Multi-flows | Convergence of flows from multiple gates |
Impacts on Product Quality
Weld marks do more than just spoil appearances; they might weaken your product’s strength. At these lines, the tensile and impact strength of the product may be compromised. Imagine a stunning plastic shell for electronics spoiled by these lines. Aesthetic issues also arise, as weld marks can be visible, particularly in products requiring high visual quality like electronic cases.
Reducing Weld Marks
Thankfully, there are several strategies to minimize weld marks:
- Adjust Injection Settings: By changing injection speed and pressure, you help ensure that flows meet at optimal temperatures and conditions, minimizing visible seams.
- Rethink Mold Design: Designing molds with fewer obstacles or using techniques like venting might reduce weld marks.
Implementing these methods in mold design5 can greatly improve both product quality and performance. Exploring new design approaches might hold the key to stronger and better-looking molded products.
Related Phenomena
- Flash (Overflow): Ever caught by surprise as plastic spills over due to too much pressure or weak clamping?
- Shrinkage Marks: Those annoying dents from uneven cooling or lack of holding pressure that spoil a smooth surface.
For further insights into these matters, exploring injection molding challenges6 can provide useful tips for optimizing production processes and achieving excellent results. Balancing aspects like mold design and injection settings is crucial for solving these issues well.
| Related Defect | Key Cause | Impact |
|---|---|---|
| Flash | High pressure | Uneven edges |
| Shrinkage | Cooling issues | Surface dents |
Weld marks form at the convergence of plastic flows.True
Weld marks occur when separate flows of molten plastic meet and fail to bond completely.
Weld marks only affect the appearance of plastic components.False
Weld marks can also compromise the tensile and impact strength of products.
How Can Bubbles Be Prevented During Molding?
Ever tried shaping a flawless plastic item and found annoying bubbles messing up all your efforts?
Materials should be very dry to stop bubbles during molding. Control the speed of injection carefully. Proper mold venting is important to reduce cavitation. This helps improve product quality. Quality is really important.

Understanding the Causes of Bubbles
I recall my early days in the mold industry, facing those annoying bubbles that appeared just when things went well. It felt like cooking a perfect soufflé only to see it collapse. But, like learning a recipe, knowing what causes these bubbles changed everything.
Bubbles, also known as cavitation, trouble mold designers often. They are usually due to moisture, volatile substances or poor mold exhaust. Imagine you want to mold something beautiful, but the materials are not fully dry. What occurs then? The moisture turns into vapor during molding and bubbles form. Or maybe you set the injection speed too high, trapping air inside horribly.
Solutions to Prevent Bubble Formation
-
Material Preparation
- I always dry all plastic materials before use. It’s like drying your hair before styling – very necessary.
- Dehumidifying dryers help remove moisture content. They’re my favorite tools.
-
Injection Speed and Pressure Control
- Gradual speed adjustment helps avoid air entrapment; it’s like pouring soda slowly into a glass to prevent bubbles.
- Set pressure properly to avoid flash. Too much pressure leads to uneven edges, like frosting oozing off a cake. Too much frosting!
-
Mold Design Considerations
- Venting systems let trapped air escape. Imagine opening a window for fresh air.
- Molds with even wall thickness ensure consistent cooling and prevent shrinkage.
Example Table: Impact of Bubbles in Different Products
| Product Type | Impact of Bubbles |
|---|---|
| Plastic Containers | Compromised sealing |
| Electronic Housings | Appearance defects |
| Automotive Parts | Reduced strength and durability |
Advanced Techniques for Bubble Prevention
- Vacuum Molding: Vacuum conditions remove trapped air and moisture from the mold cavity. Picture using a vacuum cleaner to suck all the dirt out.
- Gas-assisted Injection Molding: Gas pushes the plastic melt against the mold walls to minimize air entrapment.
For more learning, I suggest checking advanced molding techniques7 to reduce defects like bubbles. These methods might improve product outcomes and increase efficiency. Also, regular mold checks and watching production details really help reduce bubbles and improve product quality.
Moisture in materials causes bubbles during molding.True
Moisture turns into vapor when heated, creating bubbles.
Increasing injection speed prevents bubble formation.False
Excessive speed can trap air, causing more bubbles.
What Causes Short Shots in the Molding Process?
Have you ever stood in your workshop, looking at a half-done mold and feeling puzzled? What possibly went wrong?
Short shots occur during molding when the injection pressure is too low or the injection speed is too slow. Poor material flow and not enough air vents also cause this problem. These reasons stop the plastic from fully filling the mold. Solving these problems leads to completely formed products. Fully formed products are important.

Injection Pressure and Speed
I remember a day when I had trouble with short shots. The pressure settings seemed okay at first, but after looking closely, I saw the injection pressure was just a bit too low to fill the mold completely. Low injection pressure held back the entire process.
One primary reason for short shots is insufficient injection pressure. The molten plastic needs adequate force to fill the entire mold cavity. If the pressure is too low or the injection speed8 is slow, the material might not reach all parts of the mold, leading to incomplete products. Adjusting these parameters can significantly reduce the occurrence of short shots.
Material Fluidity
Once, with a thick plastic, I saw how its poor flow stopped the fill in complex designs. By adjusting the temperature, we got better flow from this stubborn plastic. This step is crucial when designs require precise fills.
The fluidity of the plastic melt9 is another factor. High-viscosity materials might struggle to flow through intricate mold designs. When using these materials, optimizing temperature settings can enhance flow characteristics.
Mold Venting
Blocked vents once gave me many problems. Good venting lets air escape as the mold fills. If vents are blocked or not designed well, air stays in, stopping plastic flow and causing short shots.
Proper venting is essential to allow trapped air to escape as the mold fills. If vents are blocked or poorly designed, it can create air pockets hindering the flow of plastic and causing short shots.
Material Preparation
Materials need proper prep to avoid issues. I learned that materials not dried properly brought in moisture, hurting flow and causing bubbles.
Ensuring materials are properly prepared before use can help mitigate these issues by thoroughly drying plastic pellets before use will prevent water vapor from forming bubbles during injection.
| Cause | Description |
|---|---|
| Low Injection Pressure | Insufficient force prevents complete mold filling. |
| Slow Injection Speed | Delays in filling lead to incomplete areas. |
| Poor Material Fluidity | High-viscosity plastics struggle in reaching all mold parts. |
| Inadequate Mold Venting | Trapped air obstructs material flow, causing incomplete fills. |
| Improper Material Preparation | Moisture in materials forms bubbles and affects flow characteristics. |
Practical Solutions
Using a checklist for mold setup changed the game for me; this includes checking pressure settings and prepping materials well to reduce short shots.
Implementing a checklist for mold setup including pressure settings, speed calibrations, and material preparation processes can greatly reduce short shots.
Regular training for operators keeps everyone ready to solve problems on best practices can enhance awareness and troubleshooting capabilities during molding process.
Thinking ahead using simulation software10 saved me many hours by seeing potential problems before production; it’s a proactive way that really improves my workflow.
Low injection pressure causes short shots.True
Insufficient pressure prevents the molten plastic from filling the mold completely.
Poor material fluidity enhances mold filling.False
High-viscosity materials hinder flow, leading to incomplete mold fills.
What Design Changes Can Minimize Injection Molding Defects?
All designers know the annoyance of problems with injection molding. These faults really hurt product quality and efficiency. Here’s some positive news꞉ clever design changes solve these troublesome issues directly.
Strategic design changes really help reduce defects in injection molding. Optimizing mold structure is one crucial step. Adjusting wall thickness is another. These adjustments can significantly cut down problems like flash, shrinkage marks and weld lines.

Optimizing Mold Structure
I remember facing flash defects11 in my designs for the first time – it felt like I was losing. Then, clamping force and even parting surfaces became my allies. Proper adjustments stop the plastic melt from overflowing. This saves time on post-processing and keeps the product looking polished and smooth.
| Defect | Cause | Design Solution |
|---|---|---|
| Flash | Insufficient mold clamping force | Increase clamping force, ensure even surfaces |
Adjusting Wall Thickness
Shrinkage marks12 puzzled me at the start of my career. Consistent wall thickness in designs stops this problem. Even cooling is possible with this change, transforming the look and uniformity of products. It was a true game-changer.
Improving Material Flow
Weld marks13 frustrated me – the ugly spots where flows of plastic met. Redesigned mold flow paths helped by reducing obstacles like cores, which improved strength and appearance.
Addressing Venting and Moisture
Bubbles from poor venting or moisture were a nightmare. Better venting systems were the answer, along with using well-dried materials to minimize these defects14. Adjusting injection speeds cut cavitation and incomplete fills, bringing products closer to being defect-free.
Regular design reviews based on production feedback manage defects well, improving product quality and speeding up manufacturing. Exploring design strategies with advanced tools helps optimize injection molding processes further.
Leveraging Advanced Software Tools
Modern CAD and simulation software have been revelations; they predict potential defects allowing for adjustments that lead to better material flow and decreased cycle times. Utilizing these software solutions15 during design gives an edge in manufacturing quality products.
By implementing these design changes, manufacturers can boost product quality while cutting down costly defects in injection molding processes. Seeking advice from injection molding experts16 provides valuable insights into optimizing designs for minimal defects, ensuring you stay ahead in the competitive field.
Even surfaces prevent flash defects.True
Ensuring even parting surfaces prevents plastic melt overflow, reducing flash.
Uneven cooling reduces shrinkage marks.False
Uneven cooling causes shrinkage marks; uniform wall thickness ensures even cooling.
Conclusion
This article explores common injection molding defects like flash, shrinkage marks, weld marks, bubbles, and short shots, detailing their causes, impacts on product quality, and solutions for improvement.
-
Learn how high injection pressure and mold design flaws contribute to flash formation. ↩
-
Explore techniques to minimize flash through machine settings and mold design improvements. ↩
-
Discover other typical defects in injection molding and learn how they affect product quality. ↩
-
Discover how obstacles in mold designs affect melt flow and contribute to defects like weld marks. ↩
-
Explore expert recommendations on mold design strategies to minimize weld mark formation. ↩
-
Gain insights into managing and resolving common injection molding issues for better product quality. ↩
-
Discover innovative methods that enhance product quality by reducing common defects like bubbles. ↩
-
This link explains how varying injection speeds can influence the quality and consistency of molded products. ↩
-
Learn about how plastic melt viscosity affects flow within molds and techniques to improve it. ↩
-
Discover how simulation tools can preemptively identify issues in the molding process. ↩
-
Learn how proper mold clamping prevents material overflow, ensuring product precision. ↩
-
Understand how uniform wall thickness reduces dents and improves product appearance. ↩
-
Discover design techniques that enhance material flow for better product strength. ↩
-
Explore how improved venting systems minimize bubbles and short shots in molds. ↩
-
Learn about software features that enhance design accuracy and efficiency. ↩
-
Connect with experts to gain deeper insights into defect reduction strategies. ↩


