Tiny flaws in molded products often ruin everything. Imagine baking a cake. Just one mistake spoils it all.
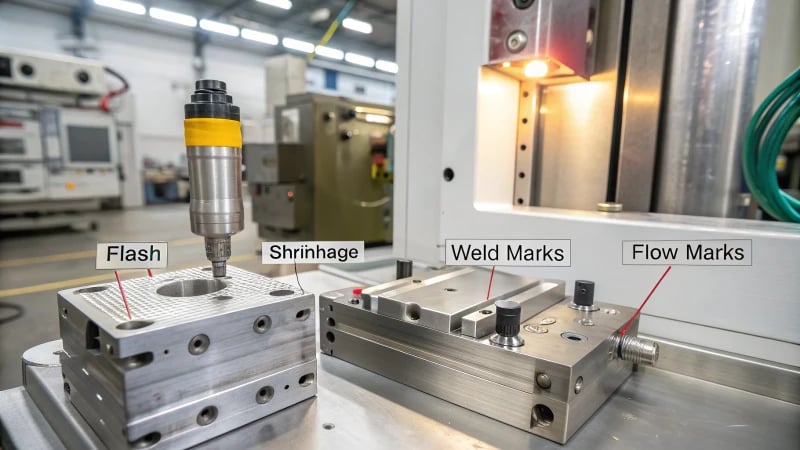
Flash, shrinkage, weld marks, flow marks and silver streaks often occur in injection molding. These defects often appear. Problems come from too much pressure, walls with different thicknesses, poor joining or trapped gases during the mold process. These issues lower product quality and performance. Quality suffers. Performance drops.
When I began my journey in the mold industry, the flaws in our injection-molded items seemed like an endless riddle. Each flaw revealed something new about the careful balance needed during the molding process. Flash happens when too much pressure or a gap lets plastic spill over the mold. It’s like squeezing out too much icing on a cake. Shrinkage dents remind me of how cookies sometimes cool unevenly, leading to bumps. Both come from uneven distribution.
Weld marks show up where different streams of hot plastic meet but don’t mix well, like when combining two shades of paint and ending up with streaks. Similarly, flow marks occur when the plastic doesn’t move smoothly through the mold, causing a wavy pattern.
Silver streaks are another challenge. These annoying gas lines appear when moisture or fumes sneak in. They mock your efforts. A sharp eye and careful tweaks in temperature, pressure or material prep stop these flaws from harming the product’s look and function. One must really learn to predict and fix these defects. Learning to handle them is just as important as knowing them, so each product meets the high standards we probably set for ourselves.
Flash occurs due to excessive pressure in molding.True
Flash is caused by excess material forcing its way out of the mold.
Shrinkage is unaffected by wall thickness variation.False
Shrinkage can be influenced by uneven wall thickness, affecting cooling.
How does flash affect injection molded products?
Plastic products sometimes have annoying bits sticking out. Factories use molds to shape plastic items. But, when the mold doesn’t fit perfectly, extra bits form. These are called "flash." Flash happens a lot. Machines cut off most of the flash, but tiny pieces might remain. Factories sometimes hurry. Then, more pieces stick out. Flawed or worn molds also cause this problem. Quality checks reduce leftovers, but not all escape notice.
Flash on injection molded products is extra plastic that spoils the look. Workers must trim it away, increasing production costs. Excessive injection pressure causes it. Poor mold alignment also leads to flash. It affects assembly. Product quality suffers.

The Effect of Flash on Appearance
Flash is an overflow of plastic that escapes from the mold during the injection process. This defect commonly occurs due to excessive injection pressure, insufficient clamping force, or an uneven mold parting surface1. When the mold cannot contain the pressure, plastic flows out through gaps, similar to water escaping a broken dam.
| Cause | Description |
|---|---|
| Excessive Pressure | High pressure forces plastic melt through gaps. |
| Insufficient Clamping | Weak clamping allows plastic leakage. |
| Uneven Mold Surface | Misaligned surfaces create gaps for flash formation. |
Economic and Functional Effects
The presence of flash not only mars the product’s appearance but also necessitates an additional trimming process, which increases production costs. This defect can also hinder the assembly performance of products, especially those requiring precise fits like consumer electronics. For example, Jacky2, a product designer, must account for potential flash when designing molds to ensure seamless assembly.
| Impact | Description |
|---|---|
| Increased Costs | Extra trimming raises production expenses. |
| Assembly Issues | Misfits during assembly due to excess material. |
Prevention and Reduction Methods
Stopping flash is like getting ready for a marathon – you need good plans and upkeep. Regular calibration of machines is really helpful; think of tuning your equipment perfectly before a trip—it’s just like adjusting molds. Proper alignment and pressure control reduce those pesky overflows.
To prevent flash from occurring, manufacturers should focus on maintaining optimal injection pressures and ensuring proper alignment of mold parts. Regular maintenance and calibration of equipment are crucial to minimizing defects.
| Strategy | Benefit |
|---|---|
| Regular Calibration | Ensures equipment operates at ideal settings. |
| Proper Alignment | Reduces gaps that lead to flash formation. |
| Pressure Control | Maintains consistent material flow, preventing overflow. |
Understanding these methods allows designers like Jacky3 and me to adjust designs smartly, making sure our products look nice and work properly without unwanted extras.
Flash increases production costs in molding.True
Flash requires additional trimming, raising production expenses.
Uneven mold surfaces prevent flash formation.False
Misaligned surfaces create gaps, leading to flash formation.
Why Is Shrinkage a Concern in Injection Molding?
Do you ever think about why your injection-molded parts sometimes differ from the design specifications? Shrinkage often causes this sneaky problem. This can impact quality. Quality really matters.
Shrinkage in injection molding happens because of uneven cooling and material contraction. These factors affect size precision and appearance. Defects like dents may occur. Mold design optimization and selecting the right materials significantly reduce these problems. Problems from shrinkage are common.

Understanding Shrinkage in Injection Molding
Picture this: you spend a lot of time designing a perfect part, but when it comes out of the mold, it looks a bit different. This is shrinkage4. It occurs when the plastic, hot and liquid at first, goes into a mold and then cools down and hardens. As it cools, it gets smaller. This can happen due to several reasons, like the type of materials used, the mold’s design, and how fast the material cools down.
Causes of Shrinkage
The main reason for shrinkage is thermal contraction. Polymers get smaller as they cool. Think of baking a cake. A cake with different thicknesses bakes unevenly. Here, thicker sections cool at a slower rate and get smaller more. This can create dents. Material type also matters; crystalline plastics shrink more than amorphous ones.
| Material Type | Typical Shrinkage Rate |
|---|---|
| Amorphous Plastics | 0.5% – 1% |
| Crystalline Plastics | 1.5% – 2% |
Impact on Product Quality
Shrinkage affects more than just appearance. Imagine a shiny car interior where every surface should look perfect. Even a tiny dent can spoil the look and possibly affect part assembly. This kind of flaw may lead to costly corrections and slow down production.
Reducing Shrinkage
Good news exists! Shrinkage decreases with smart design and the right materials. Using even wall thickness or changing cooling speed helps a lot. Modern technologies like mold temperature control systems improve cooling control.
For more detailed strategies, consulting with a mold design expert can provide tailored solutions to specific production challenges. Remember that every factor—from mold design to material choice—will influence shrinkage differently, making proactive planning essential for successful injection molding5.
Crystalline plastics shrink more than amorphous ones.True
Crystalline plastics have higher shrinkage rates, 1.5%-2%, compared to amorphous.
Uniform wall thickness reduces shrinkage in injection molding.True
Consistent wall thickness ensures even cooling, minimizing differential shrinkage.
How do weld marks form and what can be done to prevent them?
Have you ever stared at a plastic item and questioned the strange lines spoiling its look?
Weld marks show up when hot plastic moves in different paths and then comes together in the mold. This causes weak spots. Adjusting the mold design helps stop these from forming. Changing processing settings also reduces them. Consistent material quality is really important. Very important.

Understanding the Creation of Weld Marks
Imagine this scenario: a project demands accuracy and looks perfect. Suddenly, a line shows up on the surface – a weld mark. It’s similar to painting a wall and seeing a streak where the roller missed. Weld marks appear when molten plastic in a mold moves around obstacles and divides into streams, then comes together imperfectly. This often occurs in designs with complex shapes or holes.
Here’s an overview of the causes:
| Cause | Description |
|---|---|
| Mold Design | Complex geometries or thin walls can cause the melt to split and reunite improperly. |
| Material Flow Rate | Uneven flow rates lead to inconsistent merging of plastic streams. |
| Melt Temperature | Low temperatures result in poor fusion of molecular chains at the junction. |
Ways to Stop Weld Marks
I have faced this issue, altering designs late at night, understanding small changes truly impact results. These techniques worked for me:
-
Improve Mold Design
- Simplify shapes to reduce flow splitting.
- Use balanced runners and gates for even flow.
- Add venting systems to take out trapped air.
-
Change Processing Settings
- Raise injection speed to lessen flow stops.
- Ensure proper melt temperature for best fusion.
- Watch injection pressure6 carefully for steady flow.
-
Keep Material Quality
- Use high-end plastic with even properties.
- Avoid recycled materials with uneven melting points.
- Keep plastic dry to stop gas streaks, which worsen weld marks.
By fixing these issues, I saw how weld marks really go down, making products look and last better. For more advanced tips, I suggest checking out mold design principles7 and processing tech adjustments. These ideas probably enhance your production methods and raise the quality of your work.
Low melt temperature causes poor fusion in weld marks.True
Low temperatures lead to incomplete molecular fusion at junctions.
High-quality plastic increases weld mark occurrence.False
High-quality plastic with uniform properties reduces weld marks.
How Do Silver Streaks Affect Product Transparency?
Ever seen those annoying silver lines on clear plastic items? They are not only ugly but also ruin transparency.
Silver lines in molded plastics come from moisture or gases inside. These lines make the plastic less clear. Solving these issues needs improved drying and changing molding methods. Clearer plastics result from better processes.


Understanding Silver Streaks
Silver streaks are annoying lines that ruin clear plastic. In the workshop, they frustrate everyone. These streaks come from moisture and gases in the plastic. As the plastic heats up, these elements turn into vapor and move with the melted plastic. Then, they reach the surface and form streaks, which are especially visible on clear items.
Causes of Silver Streaks
Moisture in raw materials is the main problem. Imagine finding your sneakers wet and moldy because you forgot to dry them. The same happens with plastic. If plastic pellets aren’t dried well before use, problems occur. High heat causes some plastics to break down and release gases that create streaks.
-
Mold Design and Temperature:
Bad mold design worsens this issue. If the mold is too cold, it causes uneven flow, like trying to pour a thick smoothie through a thin straw.Factor Description Material Moisture Insufficient drying leads to gas formation during melting. High Temperatures Excessive heat decomposes plastic, generating gases. Mold Design Inadequate cooling channels can trap gases.
Impact on Transparency
Clarity is important. Silver streaks ruin look and function. Products like lenses or clear boxes must be perfect. Small defects can cause big problems.
-
Consumer Perception:
Nobody likes finding a flaw on new items. Streaks make products appear cheap. This view damages brand reputation and customer satisfaction. -
Functional Integrity:
In areas demanding clear parts, like medical tools or car parts, streaks create serious issues. They can harm how a product works.
Reducing Silver Streaks
To avoid streaks, manufacturers must dry materials completely. Think of it like thoroughly drying clothes before folding—it’s vital but often ignored. Properly drying materials removes moisture; adjusting molding temperatures and designs can stop gases from forming.
For more ways to fix defects, explore injection molding optimization8.
-
Pre-Drying Raw Materials:
Drying is crucial for materials such as ABS or polycarbonate. -
Adjusting Molding Parameters:
Changing temperature and ensuring good mold design helps prevent gas entrapment.
By facing these challenges, manufacturers slash silver streaks significantly improving product clarity and quality—it’s all about mixing science with art.
Silver streaks are caused by moisture in raw materials.True
Moisture in plastic materials forms gases during molding, causing streaks.
High mold temperatures prevent silver streaks formation.False
Excessive heat decomposes plastics, generating gases that cause streaks.
Conclusion
Common defects in injection molded products include flash, shrinkage, weld marks, flow marks, and silver streaks, impacting appearance and performance due to improper molding conditions.
-
This link explores the causes of uneven mold parting surfaces, a primary reason for flash formation. ↩
-
Understanding how flash affects assembly performance helps mitigate related issues. ↩
-
Discover design strategies that minimize flash defects and enhance product quality. ↩
-
Explore the factors influencing shrinkage to better understand how to prevent defects in molded parts. ↩
-
Discover advanced techniques and technologies designed to minimize shrinkage in injection molding processes. ↩
-
Learning about injection pressure control can help optimize flow conditions and reduce defects. ↩
-
Exploring advanced mold design principles can lead to better product quality by minimizing weld marks. ↩
-
Discover techniques to refine molding processes, reducing defects like silver streaks and improving product clarity. ↩


