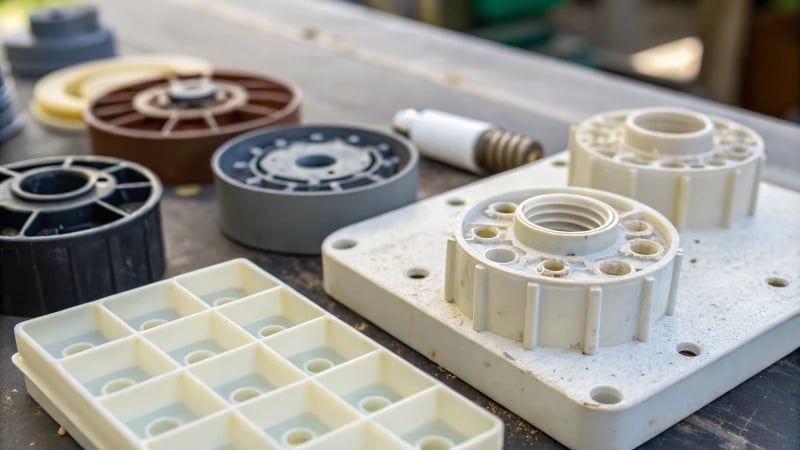
Flash problems in injection molding often seem like a never-ending game, appearing right when everything seems fine.
Extra material sometimes leaks out of the mold in injection molded products. This happens because of poorly fitting molds, wrong injection settings or the wrong materials. Workers need to inspect and fix the mold. They should adjust the process settings and choose suitable materials to reduce flaws. These steps help a lot.
I have spent many hours working with molds, trying to get the fit just right. Imagine putting together IKEA furniture and realizing a missed step. It’s frustrating, but you can usually fix it. Align the mold’s surfaces perfectly, avoiding wear or dirt that causes flashes. Check mold gaps and make sure the exhaust system stays clear.
Injection parameters are like cooking. Use the right temperature and timing. Reduce injection and holding pressures bit by bit. Slow down the injection speed if needed. These small changes can lower flash problems a lot.
Materials are important too. Picking the right one feels like choosing the perfect shoes – very important for comfort and function. Material fluidity must be suitable. Control its temperature to stop it from flowing too aggressively, which can result in flash.
Flash problems are always caused by poor mold fitting.False
Flash can also result from incorrect injection parameters or unsuitable materials.
Refining process parameters can minimize flash defects.True
Adjusting injection speed, pressure, and temperature helps reduce flash issues.
How Can I Adjust My Mold to Prevent Flash?
Ever faced a moment when all seems perfect? Then, you notice an irritating flash on your shaped piece.
Key mold changes to stop flash involve checking the parting surface for wear. Mold gaps should be adjusted. Proper exhaust is necessary, so keep it in mind. Fine-tune injection settings like pressure and speed, too. Focus on these elements to avoid flash.

Mold Adjustment Basics
Here’s a little story. Back in the day, during my mold design work, I found out the hard way that even a tiny flaw in the mold parting surface1 could cause big problems. I remember when a small piece of plastic residue went unnoticed, leading to terrible flash. Now, nothing escapes my attention. I really focus on keeping the parting surface flat and clean. If there’s any wear, I polish or grind it right away.
Gaps can be tricky. I once spent a whole weekend trying to figure out why my parts had flash. It turned out to be a slider gap issue. Since then, measuring these gaps with precision is my rule – keeping slider gaps between 0.03-0.05mm truly helps.
Proper exhaust is vital as well. Poor exhaust trapped gas and increased pressure, causing flash. Checking grooves to ensure they aren’t blocked and are at the right depth (0.02-0.05mm) matters. It demands extra effort, but it’s worth it.
Fine-Tuning Injection Steps
Once upon a time, adjusting injection pressures felt like mixing music like a DJ. Small tweaks of 5-10MPa balance defects and prevent flash—really finding that spot saves trouble.
Injection speed is not just about quickness; an overly fast injection speed2 may increase cavity pressure suddenly, causing flash problems. A slower, controlled speed can avoid sudden pressure spikes that create flash problems.
Shortening injection and holding times is also a trick but with care—ensuring the product is fully molded first is key.
Material Facts
Material fluidity impacts flash occurrence significantly; using materials with less fluidity or adding fillers like calcium carbonate makes a big difference—it’s like giving the material new traits!
Temperature control is crucial as well; high temperatures lower viscosity and result in more flash risk by increasing fluidity.
| Parameter | Adjustment Range |
|---|---|
| Injection Pressure | Reduce by 5-10 MPa |
| Holding Pressure | Reduce by 3-5 MPa |
| Injection Speed | Medium to slow |
| Material Temperature | Barrel: -10 to -20°C |
| Mold: -5 to -10°C |
Each adjustment feels like putting a puzzle together—when everything fits perfectly, it’s beyond reducing waste; it’s about increasing production efficiency and delivering top-quality products. Who doesn’t love seeing their hard work succeed? Mold design3 is truly its own art form.
Flash occurs due to excessive injection pressure.True
Excessive injection pressure can cause material to overflow, creating flash.
Material with high fluidity reduces the risk of flash.False
High fluidity increases the risk of flash by making the material more likely to seep out.
How Can Injection Molding Parameters Be Optimized?
Visualize reducing flaws in your plastic items with a few simple adjustments!
Optimizing injection molding involves adjusting mold settings and selecting suitable materials. Manufacturers adjust factors like pressure, speed and fluidity. Careful management reduces defects like flash. Proper management is key.

Understanding Mold Adjustments
Proper mold adjustment plays a pivotal role in the optimization of injection molding parameters. I recall my first time seeing a mold parting surface that wasn’t flat. It was early in my career, and I learned how important these small details are. A worn parting surface can cause flash, one of those annoying defects that bother you. Now, I check the mold parting surface regularly for any irregularities. If I find any, a bit of grinding or polishing usually solves it.
Next, checking the mold gap is crucial. A gap that’s too big, especially in sliders or ejector pins, creates problems. For example, slider gaps should be maintained between 0.03-0.05mm to keep things balanced.
Additionally, the exhaust system deserves attention too. A clogged exhaust groove can be a big problem by trapping gases and increasing cavity pressure. I once had to use a fine needle to clear a stubborn blockage – an event hard to forget!
| Mold Component | Optimal Parameter |
|---|---|
| Slider Gap | 0.03-0.05mm |
| Exhaust Groove | 0.02-0.05mm depth |
Adjusting Injection Molding Process Parameters
Changing the injection and holding pressures has changed everything for me. When I started reducing these pressures, I was surprised by how much it cut defects like flash.
Reduce injection pressure gradually by 5-10MPa and holding pressure by 3-5MPa until defects diminish.
Learning the hard way, I found that too fast an injection speed can lead to pressure spikes. Going to a medium or slow speed not only improved product quality but also gave me a really calm mind.
Example of Parameter Adjustments
- Injection Pressure: Lower by 5-10MPa.
- Holding Pressure: Reduce by 3-5MPa.
- Injection Speed: Shift from fast to medium/slow.
Material Considerations
Choosing the right material influences the process greatly. Once, a material with too much fluidity led to more flash than I wanted.
Now, I choose materials with slightly less fluidity or those that let me add fillers like calcium carbonate.
Controlling temperature is very important too; changing the barrel temperature by 10-20℃ and mold temperature by 5-10℃ makes a big difference in results.
| Material Aspect | Adjustment Recommendations |
|---|---|
| Material Fluidity | Use fillers (10%-30%) |
| Barrel Temperature | Reduce by 10-20℃ |
| Mold Temperature | Decrease by 5-10℃ |
Seeing how these adjustments fit modern facilities has opened my eyes parameter optimization techniques4. It’s amazing how parameter optimization techniques suit specific production needs customized molding strategies5. Each change feels like a puzzle piece fitting perfectly, making the process feel so rewarding.
Slider gaps should be 0.03-0.05mm to prevent flash.True
Maintaining slider gaps within this range minimizes flash by ensuring proper mold closure.
Reducing injection speed increases cavity pressure instantly.False
High injection speeds increase cavity pressure, not reducing it.
How Does Material Selection Influence Flash Reduction?
Picking the best material is key to reducing flash during injection molding. I will explain the reasons and methods.
Material choice influences flash reduction by managing fluidity and temperature during molding. Selecting the correct material avoids overflow. This results in a tight mold fit and less flash. Product quality gets better. Waste decreases.

Material Fluidity and Flash
When I started with molds, learning how important fluidity was happened quickly. Picture the material like a sneaky liquid trying to slip through every tiny space in the mold. High fluidity enters gaps easily and leads to unwanted flash. Choosing materials with controlled fluidity or adjusting mixtures using fillers like calcium carbonate is very useful. These fillers help control fluidity and increase strength and durability.
Practical Adjustments with Fillers
In one project, mixing different fillers gave me the perfect blend of fluidity and strength. Calculating the exact percentage each time based on product needs felt like a science experiment. Achieving precision was incredibly satisfying.
| Filler Type | Impact on Fluidity | Typical Usage Percentage |
|---|---|---|
| Calcium Carbonate | Reduces fluidity | 10%-30% |
| Talcum Powder | Enhances rigidity | 5%-20% |
Temperature Control in Material Selection
The first time I saw the impact of temperature was surprising. It was almost magical – high temperatures increased fluidity and flash risk. Now, selecting materials that perform well even at moderate temperatures is my routine.
For thermoplastics, adjusting the barrel by just 10-20°C and mold temperatures by 5-10°C controls the situation. This small change preserves the material’s thickness and lowers flash significantly.
Mold Adjustments and Material Compatibility
Selecting the right material means more than just choosing a compound; it guides mold adjustments too. Keeping mold’s parting surfaces intact is crucial to avoid flash. Various materials apply different pressures, so mold design changes for compatibility are important.
- Mold Parting Surface: Keeping these surfaces really smooth and free from wear is crucial, especially for materials requiring high pressures.
- Mold Gap Management: Some materials are less compressible and need tighter gap controls. Adjusting slider gaps or adding gaskets is often necessary.
Choosing the right material influences many factors, including injection pressure and speed. Correct selection really affects quality and efficiency.
Calcium carbonate reduces material fluidity.True
Calcium carbonate is used as a filler to reduce fluidity in materials.
Higher fluidity materials always prevent flash.False
Higher fluidity can cause materials to seep into mold gaps, causing flash.
How Can I Control Flash in Complex Molds Effectively?
Have you ever felt stuck in the confusing mess of flash during the injection molding process? I completely understand this challenge. Learning new methods could transform everything, improving both quality and efficiency.
Managing flash in complex molds involves adjusting parts like parting surfaces and gaps. Tweaking injection settings is essential. Material properties must also be considered. These steps significantly lower defects. Production quality improves greatly.

Mold Adjustments
Think of how good it feels when everything fits perfectly. That’s our goal with mold adjustments.
First, check the mold parting surface. This is like ensuring a puzzle piece fits without scratches or dirt. If there’s damage or dirt, fix it by grinding or polishing6 to maintain accuracy.
Now, consider the mold gap. Think of trying to squeeze into tight jeans. If gaps are too large, it fails to fit well. Measure these gaps with care, typically between 0.03-0.05mm, to reduce flash. Swapping sliders or adding a thin layer might solve the issue.
Remember the exhaust system. Imagine trying to breathe in a very cramped room. If the mold’s groove blocks, cavity pressure rises and causes flash. Regular checks and cleaning with sharp tools or air help maintain good airflow.
Injection Molding Process Parameter Adjustment
Think of injection parameters as tuning a radio for clear sound.
- Injection pressure and holding pressure are very important. Lower these pressures slowly, maybe by 5-10MPa, to deal with flash problems.
- The same applies for injection speed7; slowing down fills the cavity evenly.
- Cut both injection time and holding time if needed; it’s similar to cooking – shorten the time but hit the right balance to avoid mistakes.
Material Considerations
Choosing material feels unpredictable but it matters.
The fluidity of the material impacts flash production. Materials with less fluidity or fillers like calcium carbonate might help control this issue.
Adjusting material temperature8 by modifying barrel and mold settings manages viscosity and reduces flash risks.
| Parameter | Adjustment Method | Benefits |
|---|---|---|
| Mold parting surface | Grinding/Polishing | Ensures flatness |
| Mold gap | Replace/Add gasket | Minimizes flash |
| Exhaust system | Clean grooves | Reduces cavity pressure |
| Injection pressure | Lower gradually | Reduces defect risk |
| Injection speed | Slow down | Smooth cavity filling |
| Material fluidity | Add fillers/Lower temp | Controls flow and flash |
Integrating these smart techniques has led to better mold performance and very good product quality in injection molding processes. Small changes can achieve big results!
Mold parting surfaces should be polished for flatness.True
Polishing ensures the mold parting surfaces are flat, preventing flash.
Higher injection pressure reduces flash occurrence.False
Reducing injection pressure helps decrease flash, not increasing it.
Conclusion
This article discusses effective strategies to address flash problems in injection molded products, focusing on mold adjustments, process parameter optimization, and material selection to enhance product quality.
-
Discover detailed methods to assess and repair mold parting surfaces, ensuring they remain flat and free of defects. ↩
-
Learn how adjusting injection speeds can prevent defects like flash by balancing cavity pressure. ↩
-
Explore comprehensive principles that guide effective mold design and prevent common defects such as flash. ↩
-
Discover practical techniques used in the industry for optimizing injection molding parameters effectively. ↩
-
Learn about tailored strategies that can enhance efficiency and quality for different production requirements. ↩
-
Explore methods to maintain mold parting surfaces for optimal mold function. ↩
-
Discover ways to fine-tune injection speed for better molding results. ↩
-
Learn about ideal temperature settings to manage material properties. ↩


