When I started learning about injection molding, I was surprised to see how small adjustments often led to success or failure in a product.
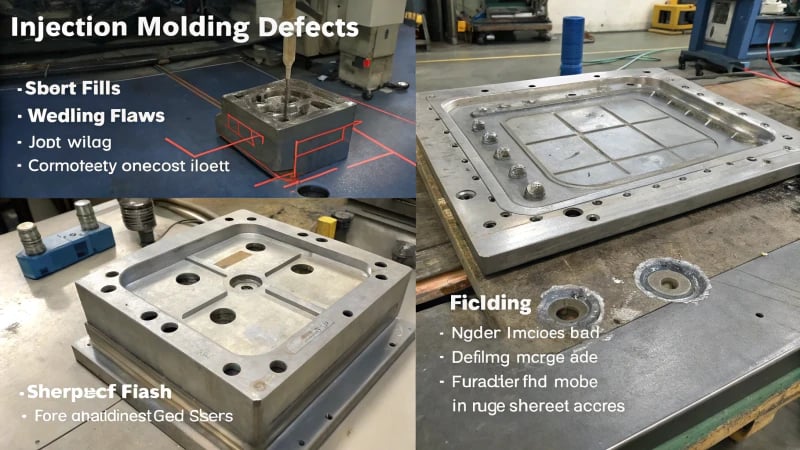
Wrong pressure settings during injection might create defects like short shots, flash, shrink marks, welding marks, jet marks and bubbles. These problems arise when the pressure is not accurate – either too low or very high – and this impacts the product’s quality, appearance and function. Quality, look and functionality suffer.
Reflecting on my early days in molding, I remember feeling frustrated when a container leaked because of a short shot. Low pressure caused this classic problem, leaving parts of the mold empty. On the other hand, high pressure led to flash, where material escaped and created extra bits to cut off. Each flaw reveals a story of imbalance. Understanding these details is very important for anyone entering the complex world of molding. Pressure settings need adjustment. Learning how to adjust these settings can help avoid these annoying defects.
Improper pressure causes short shots in molding.True
Short shots occur when the mold is not completely filled, often due to low pressure.
High injection pressure eliminates all molding defects.False
High pressure can cause defects like flash and jet marks, not eliminate them.
What Causes Short Shots in Injection Molding and How Can They Be Prevented?
Have you ever tried solving a puzzle, only to discover a piece is missing? This is how it feels when short shots happen in injection molding.
Short shots in injection molding occur when pressure isn’t strong enough to fill the mold with molten plastic, leaving empty spaces in the item. This flaw frequently shows up in products with thin walls or intricate shapes. It really affects both their performance and look.

Understanding Short Shots in Injection Molding
I remember my first encounter with a short shot during the injection molding process. The task involved making plastic containers, yet the containers kept coming out unfinished despite our hard work. It was frustrating until I figured out it was due to not enough pressure during molding.
A short shot1 occurs when the molten plastic does not completely fill the mold cavity. Think of pouring pancake batter into a mold but having insufficient batter to fill it. The main reason? Insufficient injection pressure to push the plastic all the way through.
Causes of Short Shots
When pressure is too low, the plastic cannot reach every part of the mold. This is especially problematic for items with thin walls or complex shapes. It’s a bit like trying to push peanut butter through a straw!
| Product Type | Risk Factor |
|---|---|
| Thin-walled products | High |
| Complex structures | High |
| Large flow length ratios | High |
Impact of Short Shots
The result? Products have noticeable dents or holes, badly affecting their strength and function. Like with the plastic container I mentioned – if it has a short shot, it might leak or fail to hold items correctly. It’s like finding a hole in your beloved coffee mug.
Short shots damage both the look and strength of products, causing major issues in production. They can lead to more waste and lower efficiency – imagine baking cookies with only half the dough.
Preventive Measures
Preventing short shots means fine-tuning the injection molding process2. Adjusting the pressure is very important – it must be enough to fill the mold completely. Regular equipment checks and clever mold design are also important. It’s similar to ensuring your kitchen tools work perfectly before a big family dinner.
Related Defects
While dealing with short shots, monitor other defects such as flash or shrinkage marks. Every defect has its own reasons and effects, needing different prevention methods.
| Defect Type | Cause | Impact |
|---|---|---|
| Flash | Excessive injection pressure | Affects appearance quality |
| Shrinkage Marks | Insufficient injection pressure | Causes uneven surface |
Understanding these aspects helps in identifying and fixing production problems effectively, guaranteeing high-quality outcomes for injection-molded products.
Short shots occur due to excessive injection pressure.False
Short shots occur due to insufficient, not excessive, injection pressure.
Thin-walled products have a high risk of short shots.True
Thin-walled products are prone to short shots due to high resistance.
Why Does Flash Appear During Molding?
Curious about why that annoying flash keeps appearing on your molded parts? I have experienced this too, puzzling over it.
Flash occurs during molding when too much pressure pushes the material past the edges of the mold. High pressure often exceeds what the mold can handle, causing material to spill over.

Understanding Flash in Injection Molding
Imagine you are baking cookies. You roll the dough and use cutters to shape them, but some dough always escapes past the edges. Flash in molding works similarly. Flash refers to extra material spilling over along the borders of a molded piece. This overflow happens when the injection pressure gets too high and the plastic melt3 leaks out from the mold’s parting surface.
I’ve noticed this due to a few usual reasons:
-
Mold Clamping Force: Think of pressing two slices of bread tightly to stop the peanut butter from squeezing out. The mold requires a strong clamping force to handle the pressure from the molten material. Insufficient force means the mold parts may shift, letting material escape through gaps.
-
Injection Pressure: Consider it like a pressure cooker – excess pressure causes things to spill out unexpectedly. Balancing this pressure is crucial for avoiding flash and ensuring complete filling of the mold cavity.
Factors Contributing to Flash
-
Mold Design: Mold design plays a key role. Poorly crafted molds with weak clamping force or misaligned sections are prone to flash. The design should create even pressure and proper alignment.
Factor Description Mold Parting Line An uneven or damaged parting line can lead to material escape. Slider/Ejector Pin Gaps Material may flow through gaps if not sealed properly. -
Material Properties: Materials expand differently under pressure, comparable to how some people need more space than others. Knowing these expansion characteristics4 assists in adjusting mold settings.
Mitigating Flash in Molding
To tackle flash, manufacturers could probably:
- Optimize Clamping Force: Providing adequate clamping force prevents gaps at the parting line.
- Adjust Injection Pressure: Tweaking the injection pressure maintains material flow, decreasing overflow.
- Regular Maintenance: Like you wouldn’t skip car oil changes, regular mold checks and repairs stop wear and tear, lowering flash formation risks.
Understanding these factors allows better control over the molding process, ensuring high-quality production with fewer defects like flash. Planning and adjusting injection parameters5 greatly reduce such issues. Everything running smoothly is as satisfying as baking perfect cookies!
Flash occurs when mold clamping force is insufficient.True
Insufficient clamping force allows material to escape, causing flash.
Regular maintenance increases flash occurrence in molding.False
Regular maintenance reduces wear and tear, thus minimizing flash.
How Do Shrinkage Marks Develop?
Have you ever thought about why some products don’t seem as stylish as they ought to? Let’s explore the curious world of shrinkage marks in injection molding together.
Shrinkage marks form when there is not enough injection pressure during cooling. This stops the material from filling shrinking areas properly. These marks often show up near thicker parts or complex designs of a product.

Causes of Shrinkage Marks
Shrinkage marks really trouble every designer. Imagine creating a perfect item, but then you spot those tiny dips ruining its smooth surface. It feels like finding a scratch on a new car. What causes these markings? Usually, the injection pressure during cooling is too low. The material lacks enough force to fill shrinking areas.
Insufficient Injection Pressure
Think of filling a mold with uneven walls. Some areas are thin, others are thick. Without the right pressure, thicker parts cool and shrink, leaving gaps. I saw this with thermoplastics where a small mistake causes shrinkage. Discover more in this detailed guide6 about material behavior.
Influence of Product Design
The design has a significant role. Thick walls or detailed designs often cause shrinkage marks. I worked on a project with walls over 3mm thick; the chances of shrinkage were incredibly high.
-
Wall Thickness Variation
A table illustrating how varying wall thickness affects shrinkage:
Wall Thickness (mm) Shrinkage Probability < 1.0 Low 1.0 – 3.0 Moderate > 3.0 High -
Structural Features
Ribs and columns are necessary but might increase shrinkage odds. Knowing essential design principles7 helps reduce these effects.
Injection Molding Parameters
Pressure and Speed Adjustments
Pressure and speed adjustments are crucial. I experienced short shots from low pressure – a big learning moment that created depressions, making the product useless, especially in thin-wall designs.
- Short Shot: Happens when the mold doesn’t get enough material, leading to hollow sections. I encountered this with complex designs; it was an unforgettable lesson.
- Flash: Too much pressure causes overflow, leaving extra bits to trim away.
Monitoring and Control Techniques
Technology probably makes preventing shrinkage marks easier now. Real-time sensors are standard in modern manufacturing using simulation tools8, which felt like a magic preview for shrinkage prediction.
- Simulation Tools: Essential for predicting shrinkage before production, allowing design adjustments.
- Pressure Sensors: These provide vital data to fine-tune pressure settings effectively.
Managing these factors can really reduce shrinkage marks, focusing on better product quality and performance. I’ve personally seen great improvements.
Insufficient injection pressure causes shrinkage marks.True
Low injection pressure fails to compensate for material contraction.
Thinner walls increase the risk of shrinkage marks.False
Thicker walls, not thinner, are more prone to shrinkage marks.
What Causes Welding Marks in Plastic Products?
Did you ever think about why those annoying weld lines appear on your brand-new plastic items?
Welding marks in plastic items usually come from low pressure during molding. Slow melt flow happens. Bad fusion occurs where materials meet. This causes ugly weld lines. These lines probably weaken the product.

Understanding Welding Marks
I remember the first time I noticed welding marks on some plastic casings I took care of. It felt like discovering a crack in a new phone screen – very disappointing. These marks show up as lines on plastic where melted flows meet during molding. They really cause problems, not only hurting the aesthetic quality9 but also possibly weakening the product.
Causes of Welding Marks
1. Improper Injection Pressure
One of my first lessons in molding was about injection pressure’s big role. Picture filling a water balloon using a slow trickle from a tap; with low pressure, the balloon barely fills. Similarly, low pressure in the mold means the melt flows slowly. It doesn’t join right at meeting points, creating annoying welding marks.
| Pressure | Effect on Melt |
|---|---|
| Too Low | Slow flow, poor fusion |
| Optimal | Smooth flow, complete fusion |
| Too High | Excessive flash, potential for other defects10 |
This balance is like finding the perfect balance in cooking – a bit too much or too little can ruin the batch. The melt needs enough force to fuse well without causing other issues.
2. Material Properties and Design
I’ve learned over time that the type of plastic and mold design are crucial – like secret ingredients in a recipe. These can really decide the final outcome. Some materials naturally form weld lines because of their flow traits. Plus, mold design aspects like gate location and wall thickness11 affect how these lines appear.
3. Temperature Variations
Temperature plays a big role too. Imagine cooking two eggs: one on high heat and one on low – both turn out imperfectly cooked. Similarly, if the temperature isn’t consistent in the mold, areas where the melt meets might cool unevenly. This causes incomplete fusion and those dreaded welding marks.
Keeping mold and melt temperatures just right fixes many issues, allowing the melt to stay optimally fluid during the entire process.
Troubleshooting Welding Marks
Addressing welding marks has been a trial-and-error journey for me:
- Finding the right injection pressure – balancing between too low and too high – is key.
- Simulation software has really helped analyze flow patterns; it allows adjustments in design.
- Maintaining even temperatures during molding is crucial for uniform melt flow.
By mastering these factors, I’ve reduced welding marks significantly, improving product quality to satisfy both aesthetic and strength needs. Whether for a sleek electronic device or a strong car part, each challenge solved feels like a personal win in my molding journey.
Improper injection pressure causes welding marks.True
Low pressure leads to slow melt flow, causing poor fusion and marks.
Welding marks improve product strength.False
Welding marks indicate poor fusion, potentially weakening the product.
Why Do Jet Marks and Bubbles Keep Appearing in Molding?
Have you ever thought about why annoying jet marks and bubbles appear in molded items? Molded products often have these flaws. Let’s explore the secrets of molding and find out how to fix these usual problems.
Jet marks appear when the injection pressure and speed push the plastic very quickly into molds. At the same time, bubbles emerge if air gets stuck in the melt. This happens due to wrong pressure. The result is a weakened product. Integrity suffers.

Understanding Jet Marks
Jet marks cause trouble for anyone who values perfection in molding. I recall my first time seeing them; it felt like a tiny, sneaky snake ruined my beautiful creation. These snake-like marks appear when the injection pressure12 is too strong. The plastic enters the mold too quickly. Picture trying to fill a water balloon with a firehose! This fast flow leaves patterns on the product’s surface. You don’t want this for items like cosmetic packaging13 or toys that must look perfect.
| Factors Contributing to Jet Marks | Description |
|---|---|
| High Injection Speed | Causes rapid flow of plastic melt |
| Excessive Pressure | Forces melt to shoot into mold |
Decoding Bubbles in Molding
Bubbles can spoil a perfect piece. One project looked like it had chickenpox because of bubbles. These form when air gets trapped in the plastic. Low pressure allows slow flow, trapping air, while very high pressure captures air as the melt speeds by.
| Bubble Causes | Effects on Product |
|---|---|
| Low Injection Pressure | Slow flow; air entrapment |
| High Injection Pressure | Fast flow; air entrainment |
Bubbles are not just about looks. They can cause cavities or surface problems like bulges and pits, weakening the product’s strength and density.
Other Related Issues
- Short Shot (Insufficient Filling): Imagine pouring batter into a waffle iron but finding gaps in your waffle. Gaps appear when injection pressure is too weak, leaving parts of the mold empty. This is really bad for products with thin walls or complex designs.
- Flash (Overflow): Flash first reminded me of cookie dough spilling out of a cookie cutter. It’s messy and really annoying! This happens when too much injection pressure overruns the mold’s clamping force, causing material to overflow.
- Shrinkage Marks: These usually show up near thick sections when cooling pressure is weak, ruining both looks and function. It is like having a cake that sinks in the middle – disappointing when a flawless finish is needed.
- Welding Marks: These appear when melt streams do not join properly due to low pressure, creating lines that weaken the product. In items needing strength, like tool handles, this is a serious flaw.
Understanding these common molding problems is crucial for adjusting production settings and achieving high product quality. Learning more about mold design techniques14 and making precise adjustments probably helps reduce these issues in injection molding work.
Jet marks are caused by low injection pressure.False
Jet marks occur due to high injection pressure, not low.
Bubbles can form from both low and high pressures.True
Both low and high pressures can trap air, forming bubbles.
Conclusion
Improper injection pressure adjustments in molding can lead to defects like short shots, flash, shrinkage marks, welding marks, jet marks, and bubbles, impacting product quality and functionality.
-
This link provides insights into how short shots occur during injection molding. ↩
-
Learn strategies to enhance your injection molding process and reduce defects. ↩
-
Learn how plastic melt behaves during molding to better understand flash occurrence. ↩
-
Understanding expansion helps in adjusting molds to prevent defects like flash. ↩
-
Optimizing parameters ensures quality production and minimizes defects like flash. ↩
-
Gain insights into how different materials behave under varying pressures to minimize shrinkage. ↩
-
Learn how thoughtful design can prevent shrinkage-related defects. ↩
-
Discover how real-time monitoring improves defect prevention in manufacturing. ↩
-
Explore how welding marks impact the visual appeal of plastic products. ↩
-
Learn about other defects that can occur during plastic injection molding. ↩
-
Understand how wall thickness affects mold design and defect occurrence. ↩
-
Exploring this link will help you understand how excessive pressure affects plastic flow and creates jet marks. ↩
-
This link highlights how jet marks impact aesthetic products like cosmetics, offering insights into defect management. ↩
-
Discover effective design strategies that help minimize common molding defects like jet marks and bubbles. ↩


