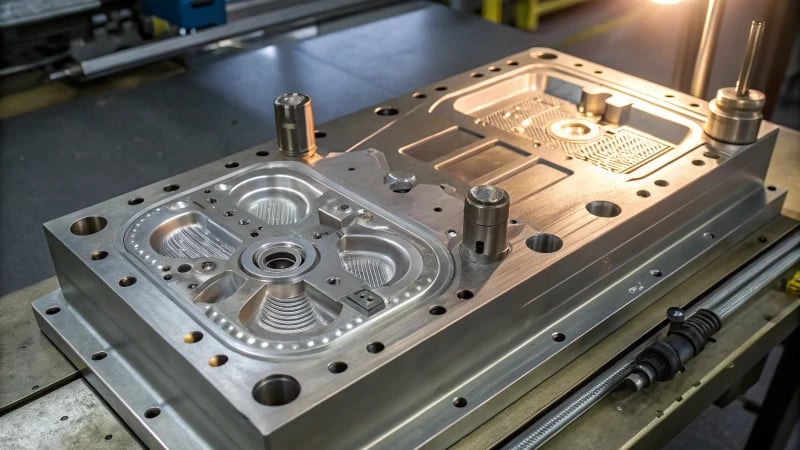
Preventing mold underfilling in injection molding involves adjusting parameters such as speed, pressure and volume. Speed or pressure should gradually rise. Accurate volume measurements are really critical to fill molds effectively. Quality must not be compromised.
Imagine this: I am in a workshop, surrounded by the buzz of machines and I see signs of a mold not fully filled. It’s annoying, but I have learned that changing the speed and pressure of injection really helps. By slowly increasing the speed or pressure and finding the right volume to inject, I often get the fill just right.
There was a time with a small bottle cap mold – I started with 50 cm/sec and increased it little by little until I found the perfect point. Speed balance matters a lot to prevent problems like trapped air or marks from the flow. Each adjustment is a move toward perfecting the mold!
Increasing injection speed prevents underfilling.True
Gradually increasing injection speed can improve mold filling.
Excessive pressure can damage molds.True
High pressure may deform or damage molds and machines.
Why Does Mold Underfilling Occur in Injection Molding?
Mold underfilling might appear small, but it often leads to serious problems. Ignoring it results in issues. Identifying causes is important to stop defects. This helps create high-quality products. Quality matters.
Mold underfilling in injection molding mostly happens due to low injection speed, pressure or volume. Adjusting these settings really helps improve mold filling. This leads to better product quality. Better quality products are the result.

Injection Speed Adjustment
Gradual Increase in Speed
Sometimes, when I’m fixing problems with mold underfilling1, I first change the injection speed. It reminds me of adjusting the speed on my bike as a child, finding just the right pace to move smoothly over bumps. For small and simple molds like bottle caps, I might raise the speed from 50 cm/sec to 70 cm/sec. It’s steady and smooth, like getting into a rhythm on that bike ride. But I always watch out for problems like melt injection or trapped air, similar to dodging potholes.
Segmented Speed Control
On the other hand, segmented speed becomes very important for more complex structures. It feels like navigating a winding road where each turn needs a different style. Thin-walled sections might need speeds up to 300 cm/sec. Thicker sections should go slower to avoid stress.
| Product Type | Speed for Thin Walls | Speed for Thick Walls |
|---|---|---|
| Simple Structures | 50-70 cm/sec | – |
| Complex Structures | 100-300 cm/sec | 30-80 cm/sec |
Injection Pressure Adjustment
Reasonable Increase in Pressure
Another important thing is the injection pressure. It’s like finding the perfect water pressure for a shower – too low leaves you cold; too high stings. By raising the pressure from 80 MPa to 85 MPa, I really see if the mold fills better. However, I always check these adjustments stay safe, much like checking my car’s tire pressure before a long drive.
Holding Pressure Optimization
When shrinkage during cooling is the problem, increasing the holding pressure helps. Moving it from 30 MPa to around 40-50 MPa often solves the issue.
Injection Volume Adjustment
Accurate Calculation of Injection Volume
Finally, recalculating the injection volume is crucial. It’s like double-checking my grocery list to buy enough for dinner. If I’m working with a product that’s 10cm x 5cm x 3cm with a density of 1.2g/cm³, I’ll calculate that I need about 180g of material. My machine’s settings should match this requirement.
| Dimension (cm) | Density (g/cm³) | Required Volume (g) |
|---|---|---|
| 10 x 5 x 3 | 1.2 | ~180 |
By understanding these details and adjusting these parameters effectively, I’ve been able to fix underfilling problems directly and keep the high-quality standards that my projects need.
Gradual speed increase prevents mold underfilling.True
Increasing injection speed gradually can improve mold filling.
Excessive pressure always improves mold filling.False
Too much pressure can damage molds or machines.
How Does Injection Speed Affect Mold Filling?
Tiny changes in injection speed may completely transform the molding process. It resembles changing the speed of a song – just a few beats dramatically alter the outcome.
Injection speed affects how molten material moves into a mold. Quick speeds often reduce cycle times; however, defects could appear. Slower speeds fill more completely but take more time.

The Role of Injection Speed in Mold Filling
Injection speed fascinates me because it deeply impacts the molding process. A small change can transform outcomes significantly, like adjusting the heat in a pasta sauce recipe improves its flavor. Injection speed2 changes how molten material moves in the mold, affecting both filling pace and final product quality.
Gradual Increase in Speed
In a project, I saw the mold wasn’t filling well. I slowly raised the injection speed, starting at 50 cm/sec and moving to 70 cm/sec. The effect was immediate. It was remarkable. Like quickly catching a train, proper speed solved the problem. But going too fast risks defects, like trapped air. Mindful adjustments matter: small products need a slight increase (10-20 cm/sec), while larger ones handle an even smaller change (5-10 cm/sec).
Segmented Speed Control
For complex designs, speed management is like orchestra conducting. Each part needs its own pace. Thin areas need quick filling (100-300 cm/sec) to avoid incomplete sections. Thick parts prefer slower speeds (30-80 cm/sec) to stop internal stress and achieve even filling.
| Segment Type | Recommended Speed |
|---|---|
| Thin-Walled | 100-300 cm/sec |
| Thick-Walled | 30-80 cm/sec |
Injection Speed vs. Injection Pressure
Temperature alone doesn’t bake a cake well; similarly, injection pressure3 is crucial in mold filling. Low pressure means underfilling, similar to having low speed. Increasing pressure gradually by 5-10 MPa helps but must stay safe to prevent damage.
Practical Applications and Calculations
Right injection volume is essential, like measuring ingredients for a cake. Recalculate cavity volumes and adjust machine settings to fit perfectly. For example, a cavity volume of 150 cm³ needs about 180 g of plastic to fill completely.
| Factor | Action |
|---|---|
| Cavity Volume | Recalculate using product dimensions |
| Injection Stroke | Adjust according to calculated requirements |
Exploring these areas shows how well understanding injection speed with other factors improves product quality. Insight into these dynamics helps us refine processes for the best results.
Gradually increasing speed can fix underfilling issues.True
Increasing speed helps fill molds by improving flow and reducing underfilling.
Excessive pressure can cause mold deformation.True
High pressure may exceed mold limits, leading to deformation or damage.
When Should You Adjust Injection Pressure Settings?
Do you often face problems with defects in injection molding? Changing pressure settings could very well be the fix you need.
To fix problems with injection pressure, begin when you see issues like underfilling or defects in the mold. Gradually raise the pressure by 5-10MPa. Always remember the mold and machine limits. Avoid possible damage. Really avoid it.

Understanding How to Adjust Injection Pressure
In my early days of working with injection molding, I quickly realized how important it was to set the pressure correctly4. It is like perfecting a dish; a bit more or less changes everything. Adjusting these settings becomes necessary when I see underfilled products or defects. I have to be careful to avoid damage.
Knowing When Pressure Should Be Changed
Underfilling: Ever seen a product that looks unfinished? That is what underfilling is. In these situations, I normally add 5-10MPa of pressure and watch to see if things get better.
Defects: It is annoying to see short shots or warping. These often mean the pressure is wrong. Here’s a simple table I use for guidance:
| Issue | Suggested Adjustment |
|---|---|
| Underfilling | Increase by 5-10MPa |
| Short Shots | Adjust as needed |
| Warping | Fine-tune incrementally |
Balancing Pressure with Machine and Mold Limits
The temptation to keep increasing pressure is strong, but considering the limits of the mold and machine is necessary. Once, I ignored this and ended up with a damaged mold. Lesson learned! Always check the rated parameters to keep things safe and avoid mold deformation5.
Optimizing Holding Pressure
Changing holding pressure affects product quality greatly. If melt shrinkage causes problems, I raise the holding pressure from 30MPa to 40-50MPa. This usually helps stabilize the shape.
Practical Considerations
Every adjustment I try works like an experiment – I test and observe what it does to product quality and equipment. Sometimes, I ask experienced professionals or use simulation tools to check my approach.
Conclusion
Adjusting injection pressure is not only about fixing defects; it is vital for ensuring high product quality. By analyzing and adjusting systematically, I keep manufacturing efficient and improve product quality. Reading more about pressure adjustments6 has given me deeper insights. Whether skilled or new, understanding these details really matters in your work.
Increasing injection speed can reduce mold underfilling.True
Gradually increasing speed helps fill molds better, reducing underfill.
High holding pressure always causes mold deformation.False
Excessive pressure risks deformation, but not all high pressures do.
Why is Injection Volume Important in Mold Filling?
Did you ever think about how much injection volume affects your mold filling process? This detail is significant. Let me explain the important parts of this step.
Injection volume is vital in mold filling. It sets the precise amount of plastic that enters the mold cavity. Correct calculation of this volume is crucial. Accurate measurement lowers defects such as underfilling or excess flash. The process gets better when these issues decrease.

The Importance of Injection Volume
In my mold design work, I found that getting the right injection volume is like finding the perfect mix for coffee – too little or too much and the result feels wrong. This directly affects the quality and consistency of what we make. The art is in calculating the exact plastic needed to fill a mold, considering shrinkage and pressure. Missing this balance can turn a good day into one full of problems.
Calculating Injection Volume
I remember when I first calculated injection volume; it was like solving a tough puzzle. You start with the mold’s size and consider material density. For example, if a part needs 150cm³ and the density is 1.2g/cm³, you’d need about 180g of plastic because of shrinkage. It’s like baking and needing perfect precision to make sure the cake rises well.
| Cavity Dimension | Density (g/cm³) | Calculated Volume (cm³) | Required Weight (g) |
|---|---|---|---|
| Example Dimensions | 1.2 | 150 | 180 |
Impact on Product Quality
I learned the hard way that wrong injection volume causes defects like underfilling, creating incomplete parts or too much flash, causing extra trimming work and wasted material. It’s like overfilling a cupcake liner; too much mix spills and makes a mess.
An incorrect injection volume can lead to various defects7 such as underfilling, where not enough material is injected, leading to incomplete parts. Conversely, excess material can cause flashing, where plastic leaks out of the mold cavity, leading to wasted resources and additional trimming processes.
Balancing Injection Volume with Speed and Pressure
Changing injection volume often means adjusting speed and pressure, too. For complex designs, segmented injection speeds are really helpful. For example, fill thin sections fast but slow down for thick parts—like driving fast on highways then slowing on city streets.
- Example Speed Adjustment:
- Thin-Walled Sections: 100-300 cm/sec
- Thick-Walled Sections: 30-80 cm/sec
Having this balance keeps the machine working smoothly without stressing the mold. Adjusting holding pressure can help manage volume reduction from cooling, keeping size stable. It’s about keeping production smooth, much like a well-run orchestra.
By adjusting injection volume with other factors, we get great production results. Exploring injection molding dynamics8 might reveal more efficiencies and ensure each project is successful.
Increasing injection speed can improve mold filling.True
Gradually increasing speed helps fill underfilled molds, improving product quality.
Excessive injection pressure does not affect mold integrity.False
Too much pressure can deform or damage molds, affecting production quality.
How Can Segmented Speed Control Optimize Complex Molds?
Have you ever experienced the annoyance of mold problems spoiling a beautifully crafted item? I certainly have.
Segmented speed control adapts injection speeds to different stages based on the mold’s unique features. This precise method avoids common errors like short shots and internal stress. The final product has very high quality. High quality, indeed.

Understanding Segmented Speed Control
When I first discovered segmented speed control in injection molding, it was like finding a hidden tool. This method changes injection speed during different stages to match a mold’s specific needs, especially for designs with complex patterns and different wall thicknesses. It’s very helpful for difficult molds that might cause sleepless nights.
Benefits of Speed Segmentation
-
Stopping Short Shots: I once had a project with thin-walled sections that were hard to fill fully. Faster speed in these areas, between 100 – 300 cm/sec, helped the melted material9 fill those annoying thin parts without leaving empty spots. This made sure the mold filled completely.
-
Reducing Internal Stresses: Slower injection in thicker sections, around 30 – 80 cm/sec, stops pressure from building up and prevents warping. The melt can settle in more easily.
| Mold Section | Recommended Speed (cm/sec) |
|---|---|
| Thin-Walled | 100 – 300 |
| Thick-Walled | 30 – 80 |
How to Use This Method
-
Step-by-Step Speed Increase: Starting with a basic speed and then slowly increasing it, about 10 – 20 cm/sec for smaller items, allows me to fine-tune the process. It’s important to watch how the mold fills and adjust as needed.
-
Live Adjustments: Using sensors for real-time information changes everything. They provide data to adjust speeds so each mold part is filled perfectly.
Challenges and Things to Think About
-
Preventing Melt Injection Problems: A faster fill speed is tempting, but finding a balance is necessary. Too much speed might result in problems like melt injection defects, which are really not worth the trouble.
-
Machine Capability: Always check if your injection molding machine10 can work with different speed changes without damage or extra wear.
Segmented speed control has greatly helped with complex molds. Changing speeds for each mold section’s needs improves product quality and cuts down on defects and cycle times. If anyone wants to learn more about these methods, looking into expert guides and case studies is a good idea.
Gradual speed increase can solve underfilling issues.True
Increasing speed gradually helps fill molds better, preventing defects.
Excessive injection pressure is always beneficial.False
Too much pressure can damage molds and machines, causing defects.
Conclusion
Adjust injection molding parameters like speed, pressure, and volume to prevent mold underfilling, ensuring high-quality products through careful adjustments and calculations.
-
Explore different strategies to resolve mold underfilling and improve production efficiency. ↩
-
Learn how molten material flow characteristics influence mold filling and product quality. ↩
-
Discover how injection speed and pressure interact to affect mold filling efficiency. ↩
-
Understanding when to adjust injection pressure enhances efficiency and reduces defects, crucial for maintaining high-quality production. ↩
-
Excessive pressure can damage molds; learn about its impact to prevent costly repairs and maintain product quality. ↩
-
Explore further resources for in-depth knowledge and best practices on managing injection pressure effectively. ↩
-
Understand common molding defects caused by incorrect injection volumes. ↩
-
Gain insights into optimizing injection molding process dynamics. ↩
-
Learn how adjusting injection speeds can help avoid short shots and improve fill quality in complex molds. ↩
-
Discover whether your equipment supports segmented speed adjustments for optimized injection molding processes. ↩


